Projects
When you are working on a campaign, initiative, or — well, project — you’ll need a place where your team can bring all kinds of files together. With projects in Cube, you can create a space for your team to work in.
A project in Cube is like a folder. You can choose to give access to only specific people or all workspace members. Keep all your related files together in a project: artwork, footage, documents, work-in-progress, deliverables and more!
Roles
At the moment, there are only two user roles for project members.
- Member. This role allows you to perform all basic functions. You can do most work you need with this role.
- Admin. An Admin role is the same as a Member role but you can also perform project management actions.
Create a project
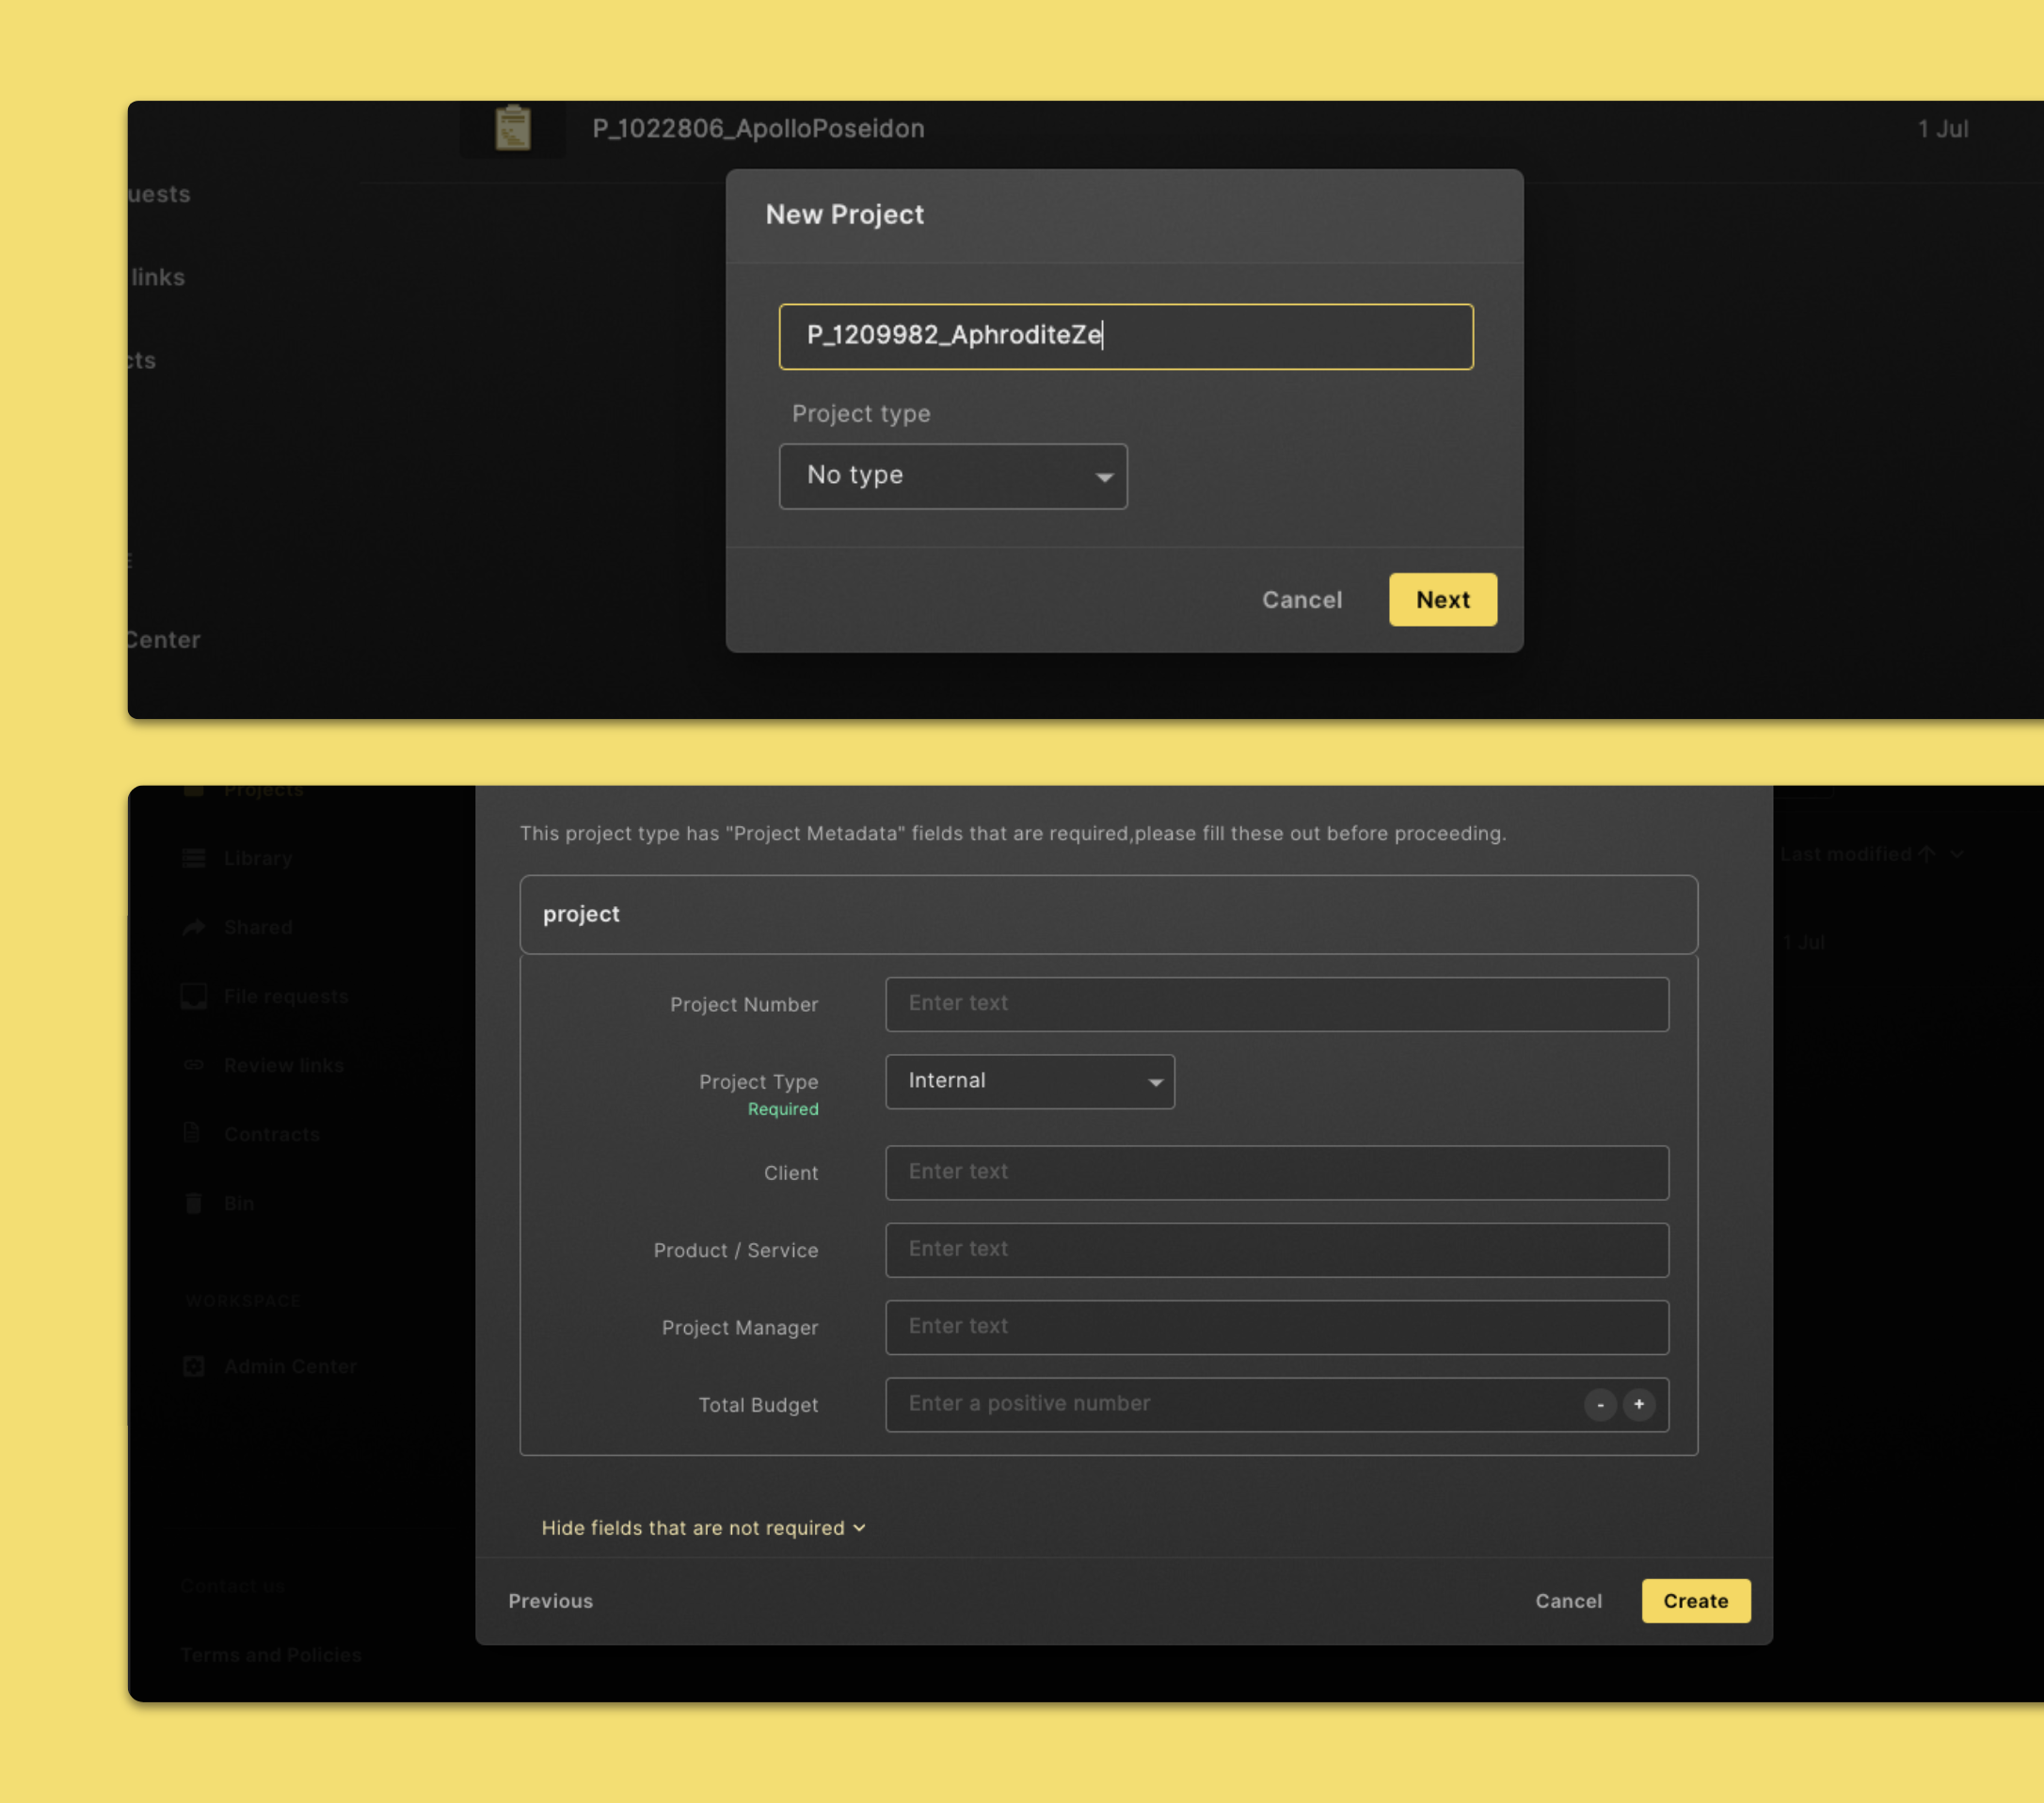
- Click Projects in the left navigation sidebar.
- Click New in the command menu in the top section of the page.
- Enter a project name. We do not allow duplicate project names, so make sure to use a project name that isn't already in use.
- You also have the option to select a Project type. This option will setup your project structure.
- When you're ready, click Next.
- After that you’re required to select a Project Type for the project metadata.
- Click on Show all project metadata fields to show all project metadata. Here you can add additional project information.
- Click on Create to create your new project.
Open a project
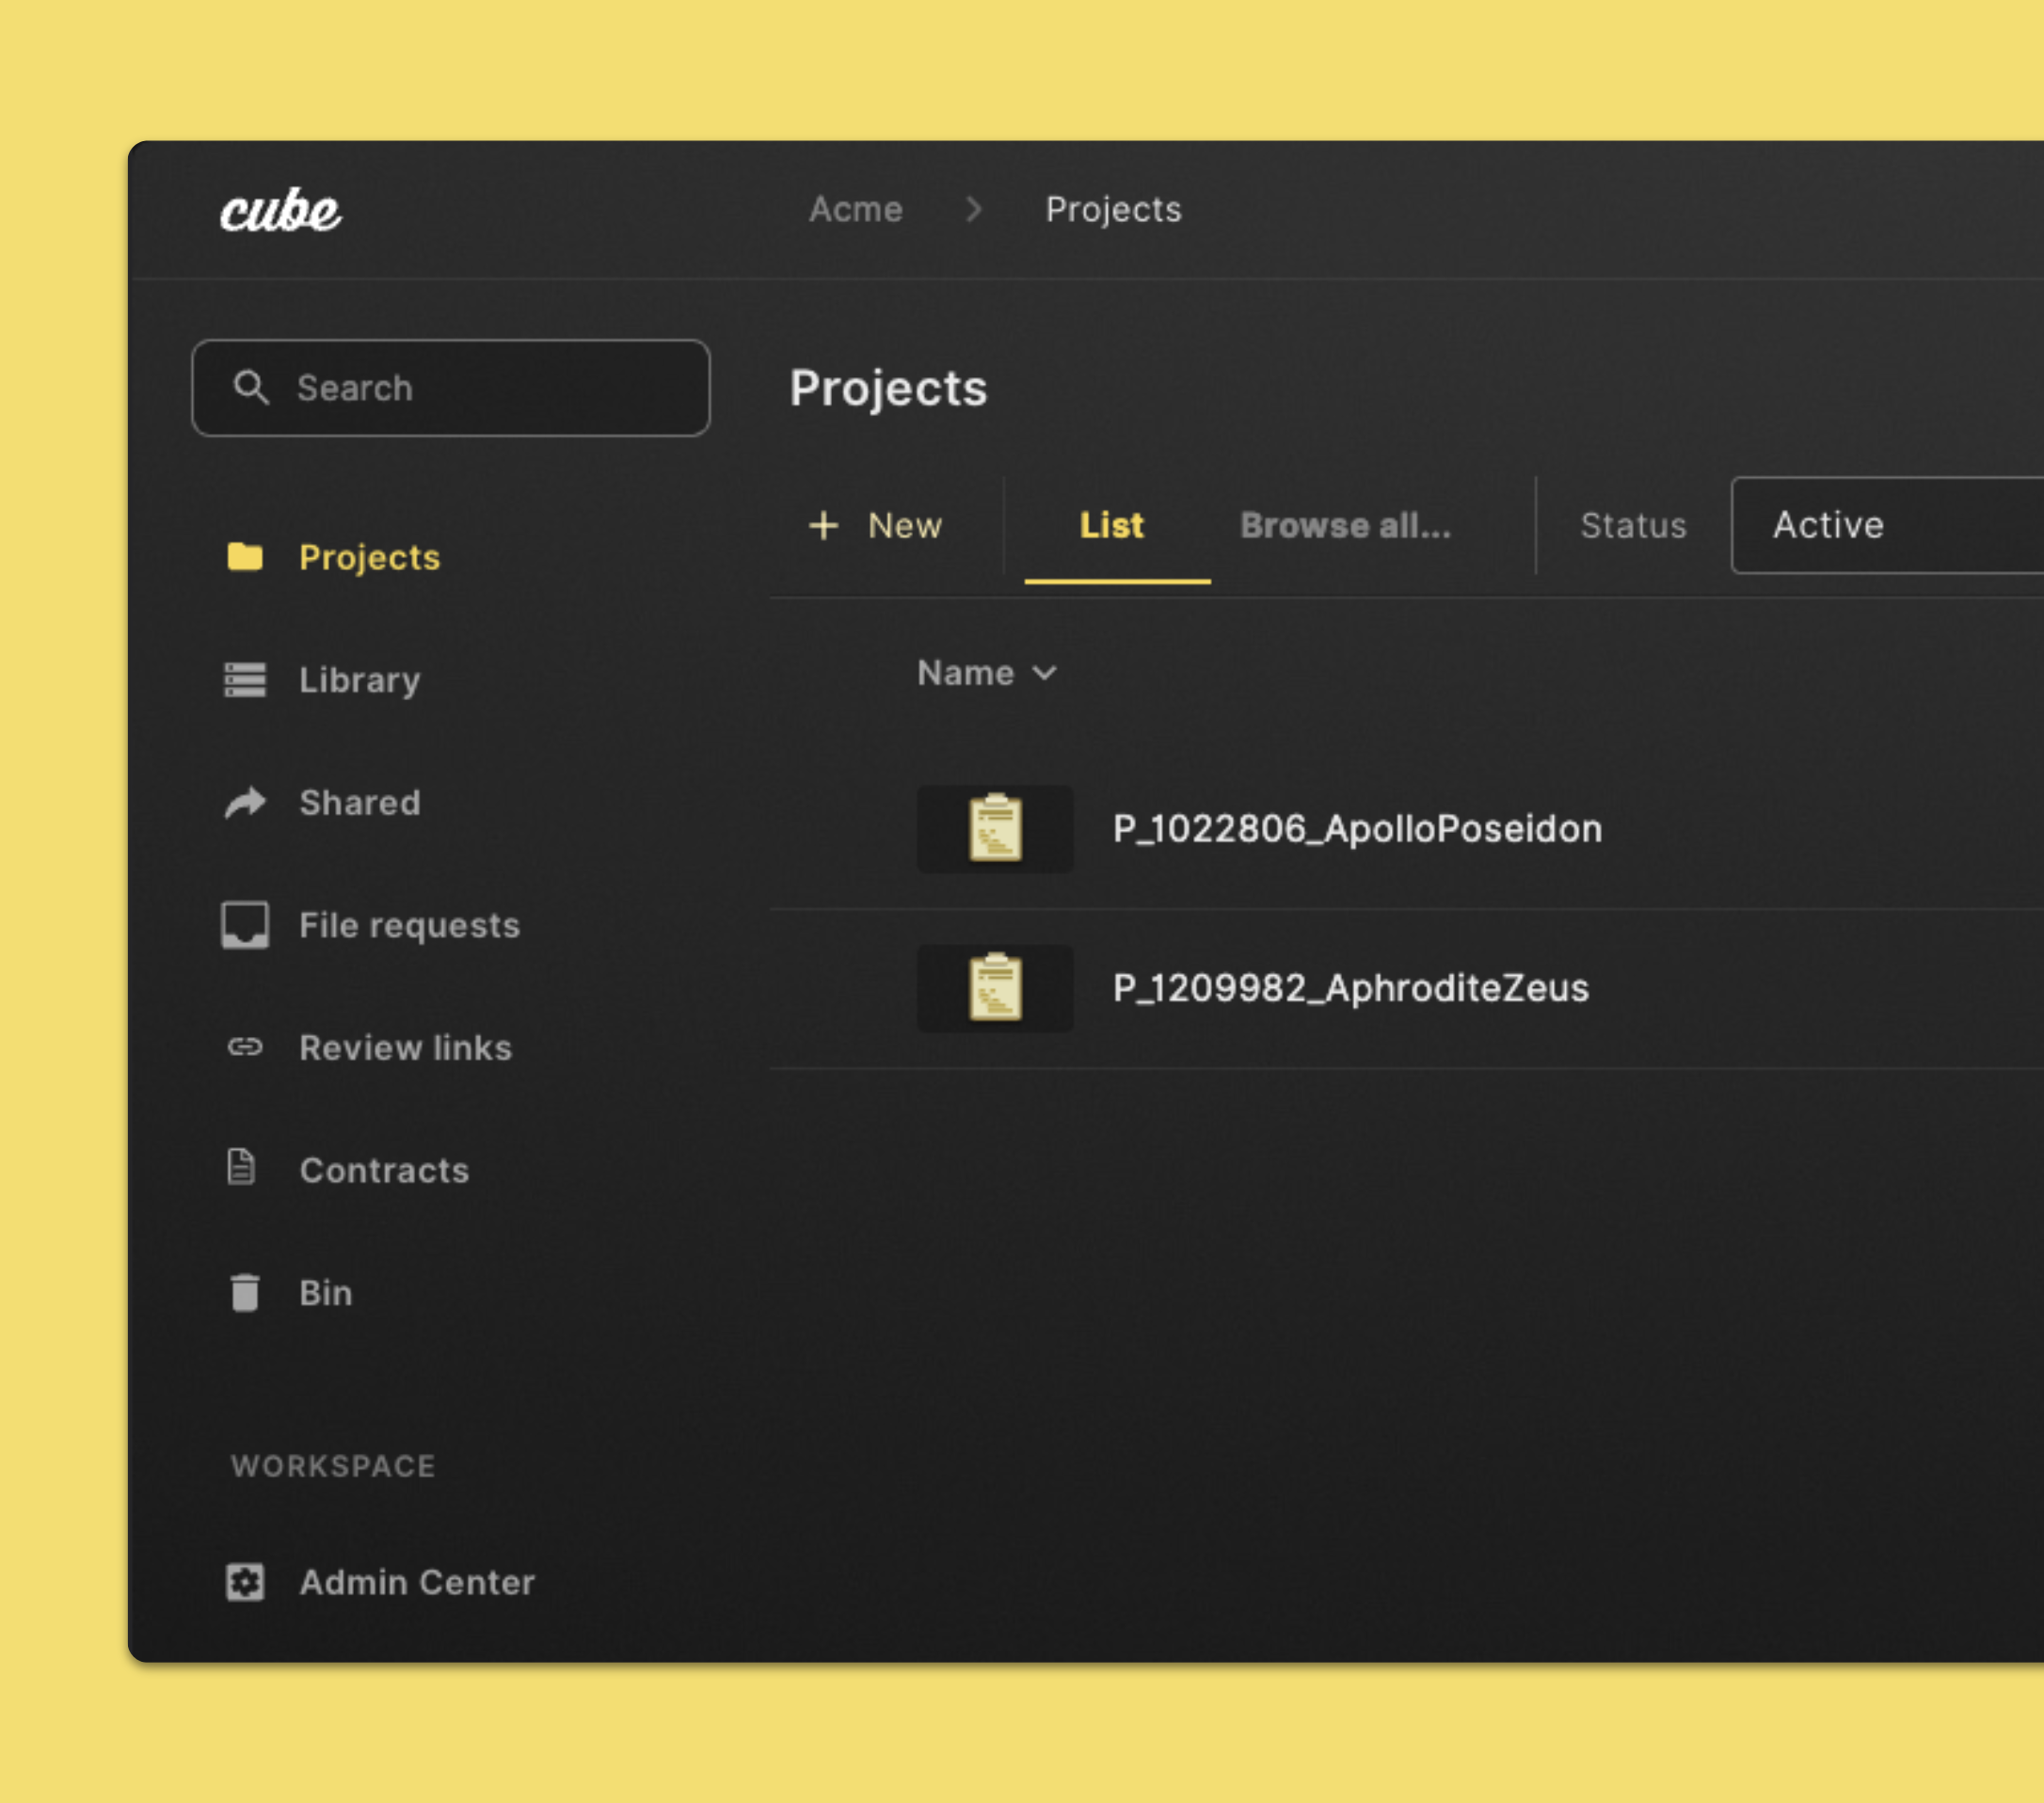
- Click Projects in the left navigation sidebar..
- Here you’ll find a list of all projects of which you are a member.
- Double click the project you want to open it.
Add people and teams to a project
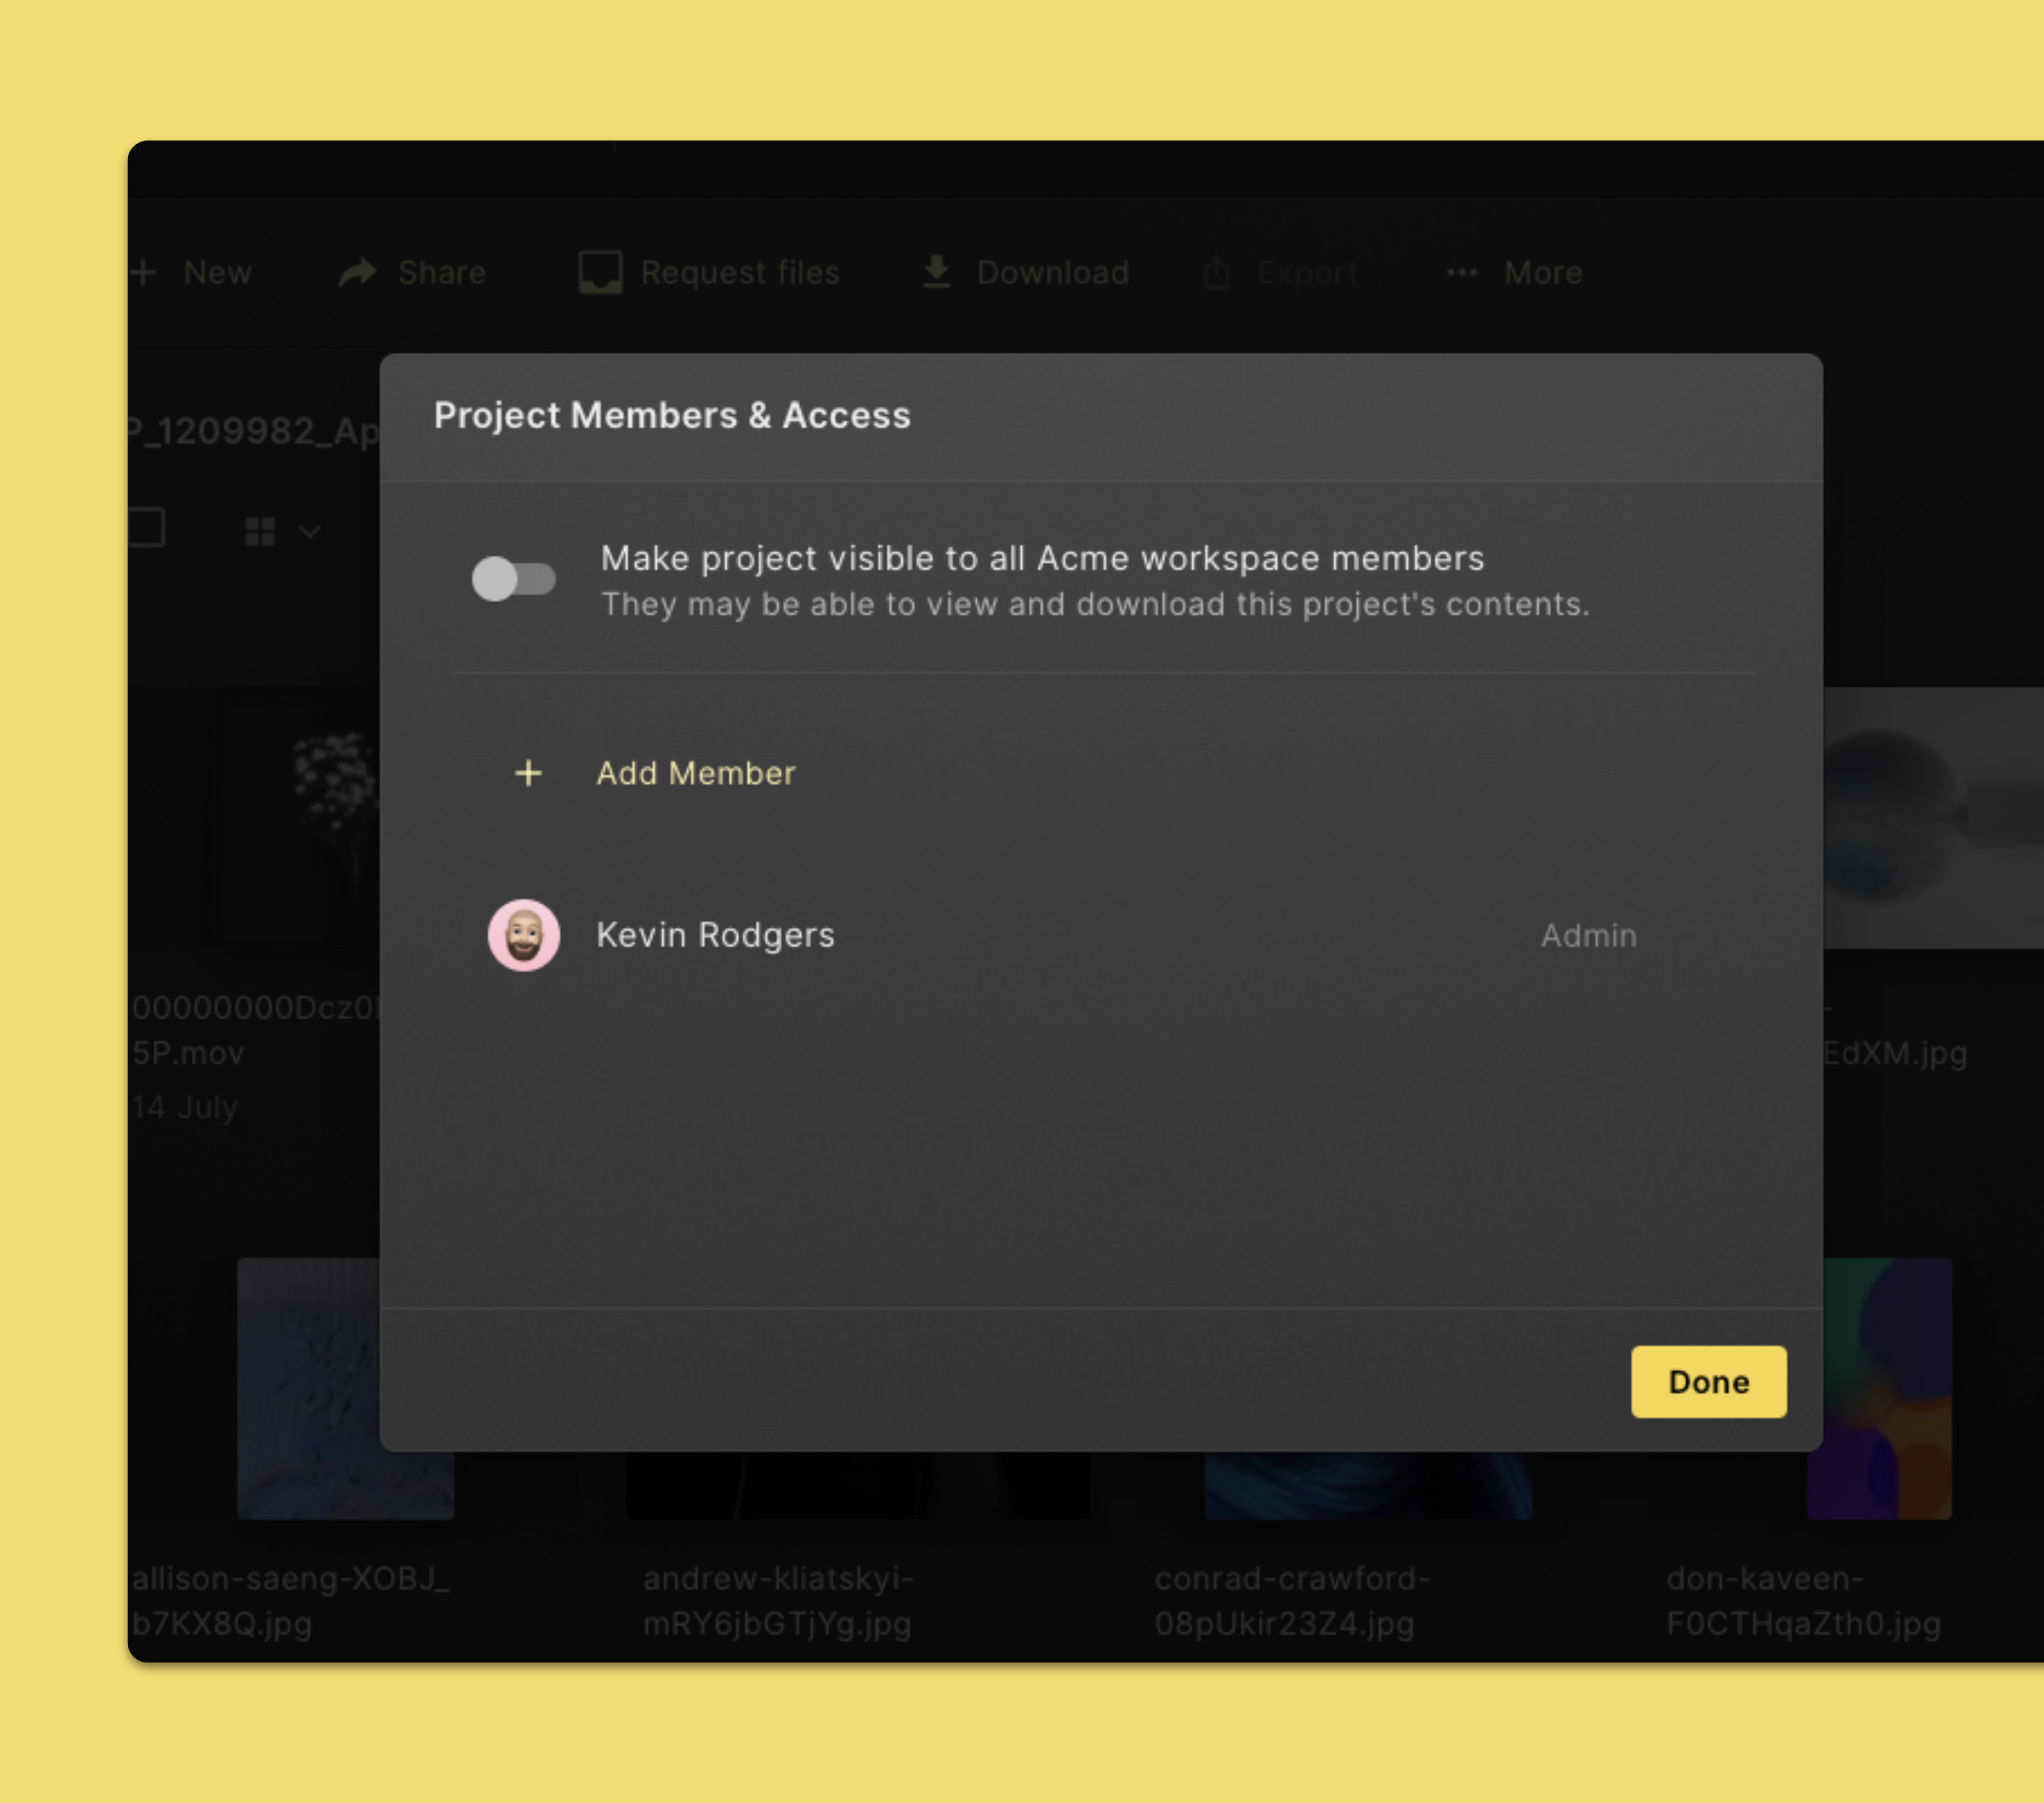
- Open the project you'd like to add someone to.
- Click Members & Access in the top section of the page.
- Click on Add Member and search for and select the people or teams you'd like to add.
- When you're done, click Add and Done.
Remove people from a project
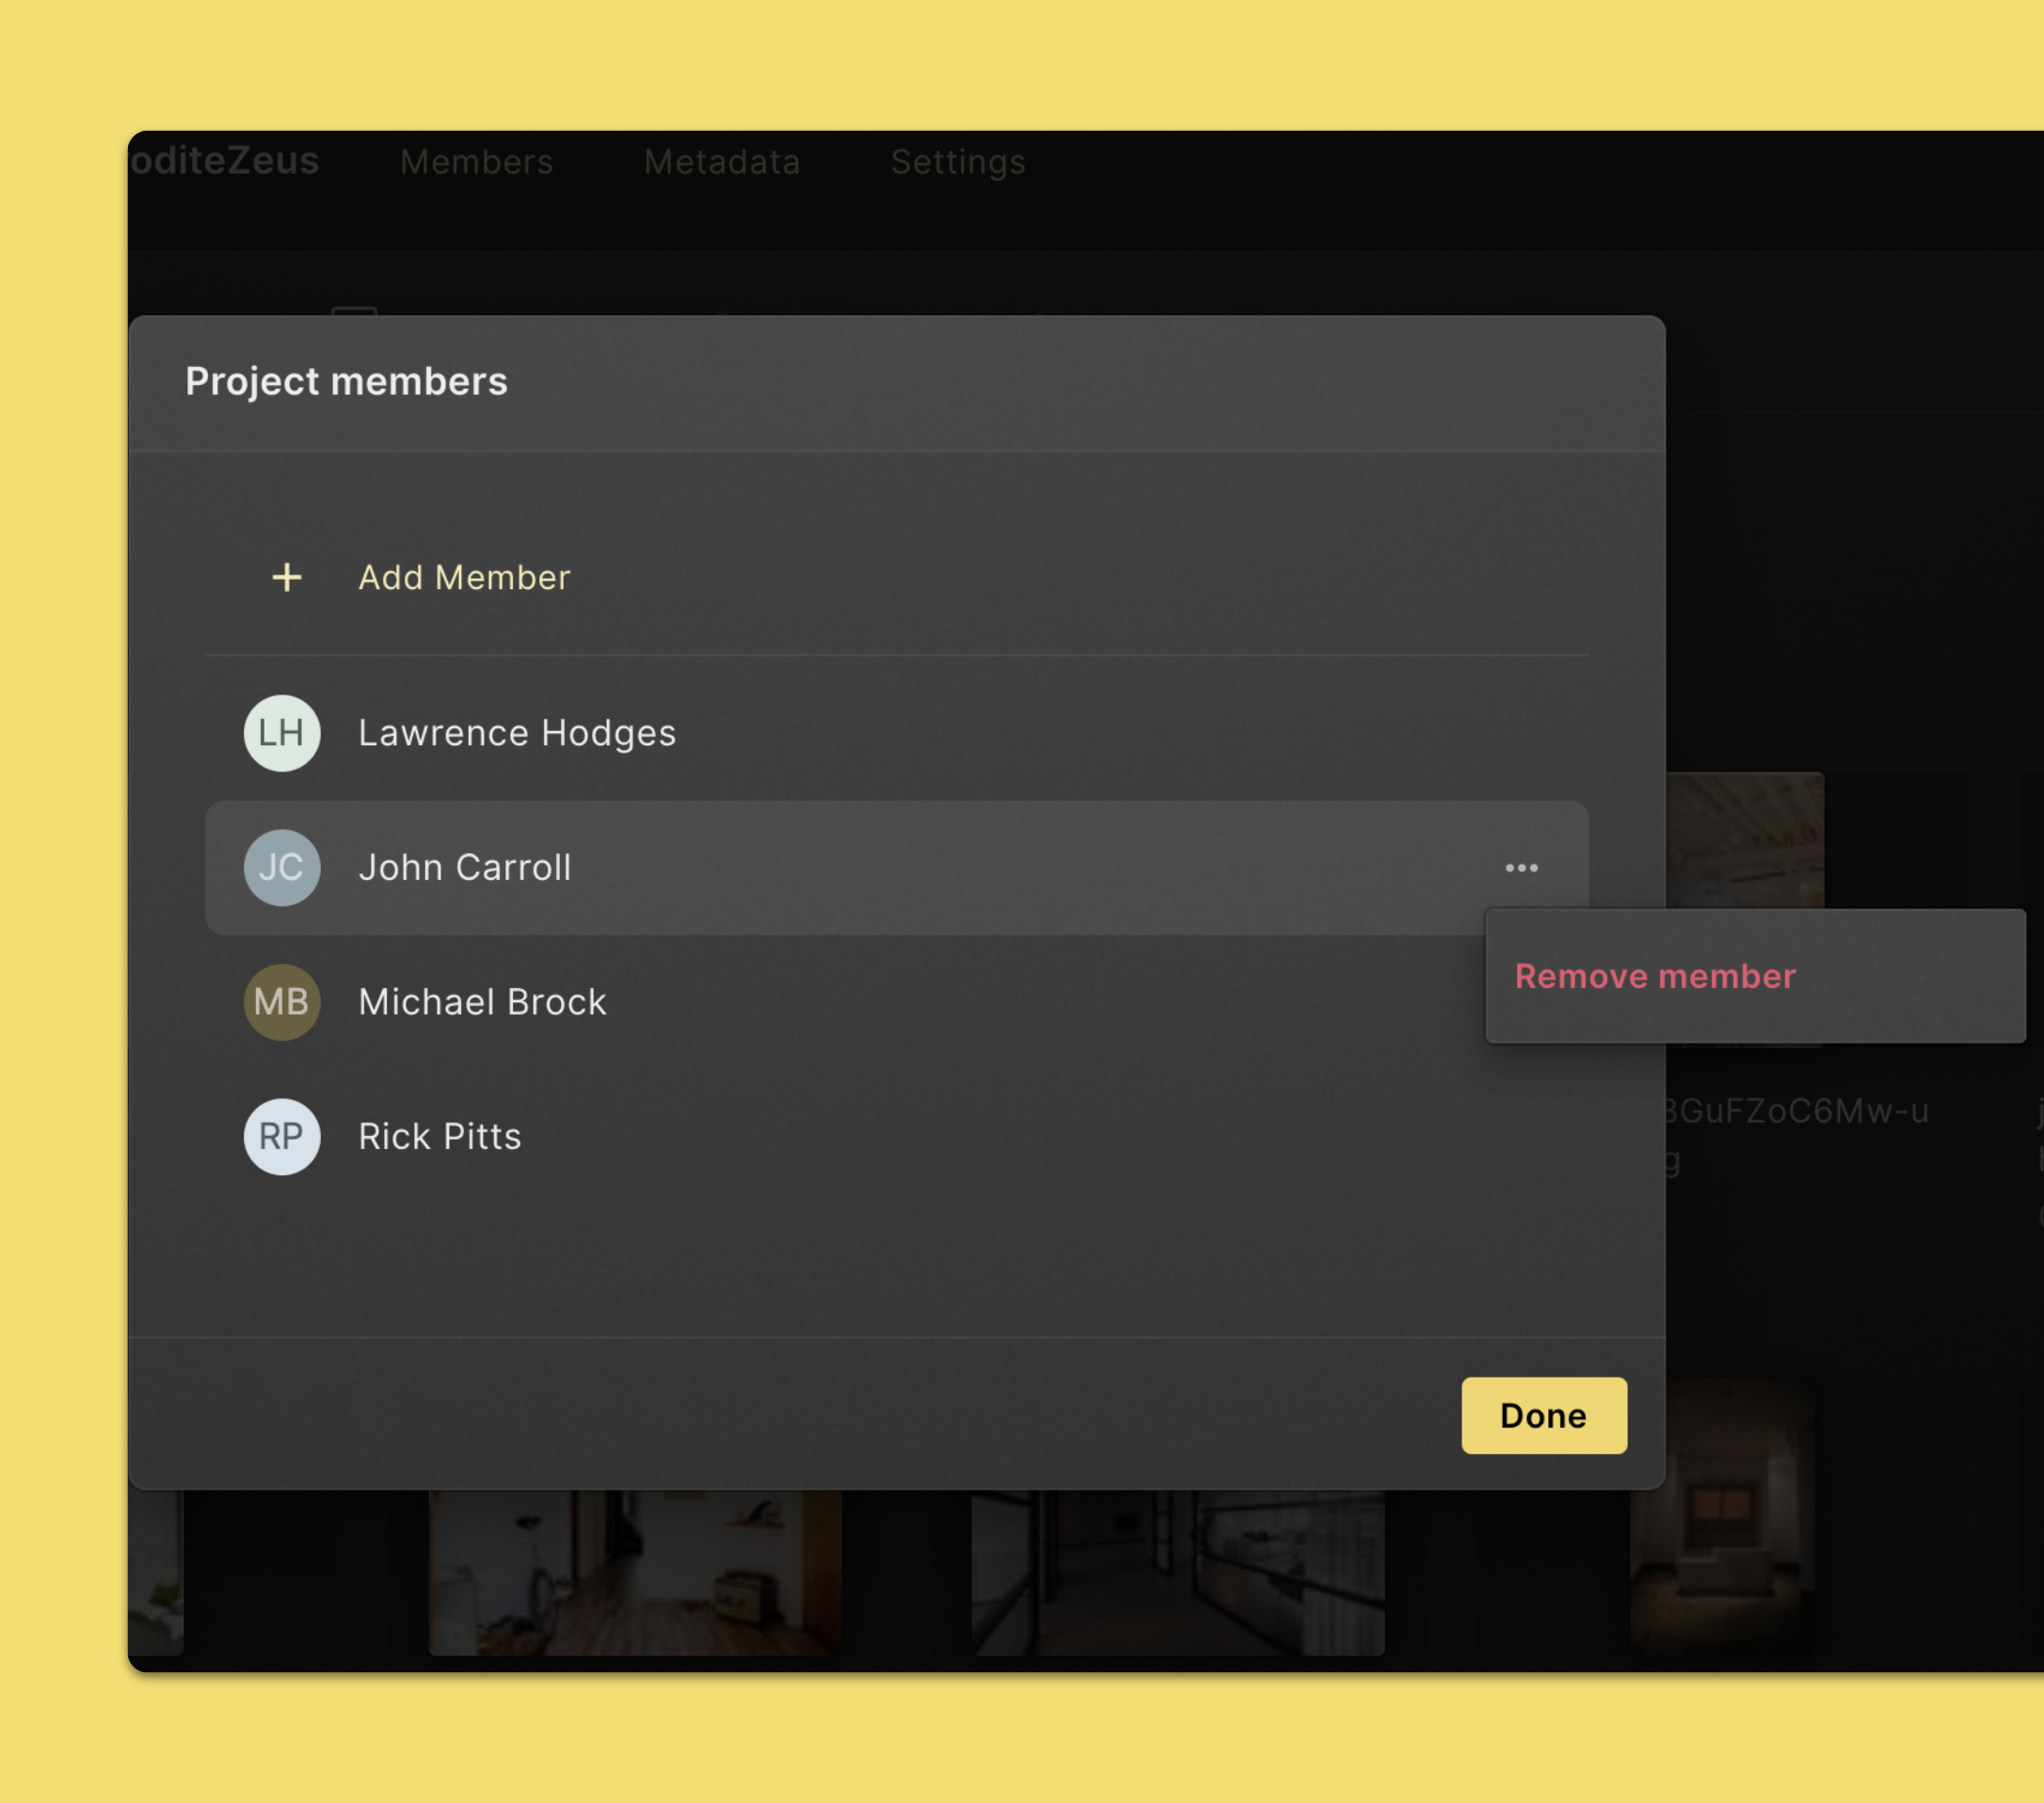
- Open the project you'd like to remove someone from.
- Click Members & Access in the top section of the page.
- Find the person you’d like to remove. Move your mouse over this person and click the Dots icon next to it.
- Click Remove Member. Click Remove again to confirm.
Project visibility
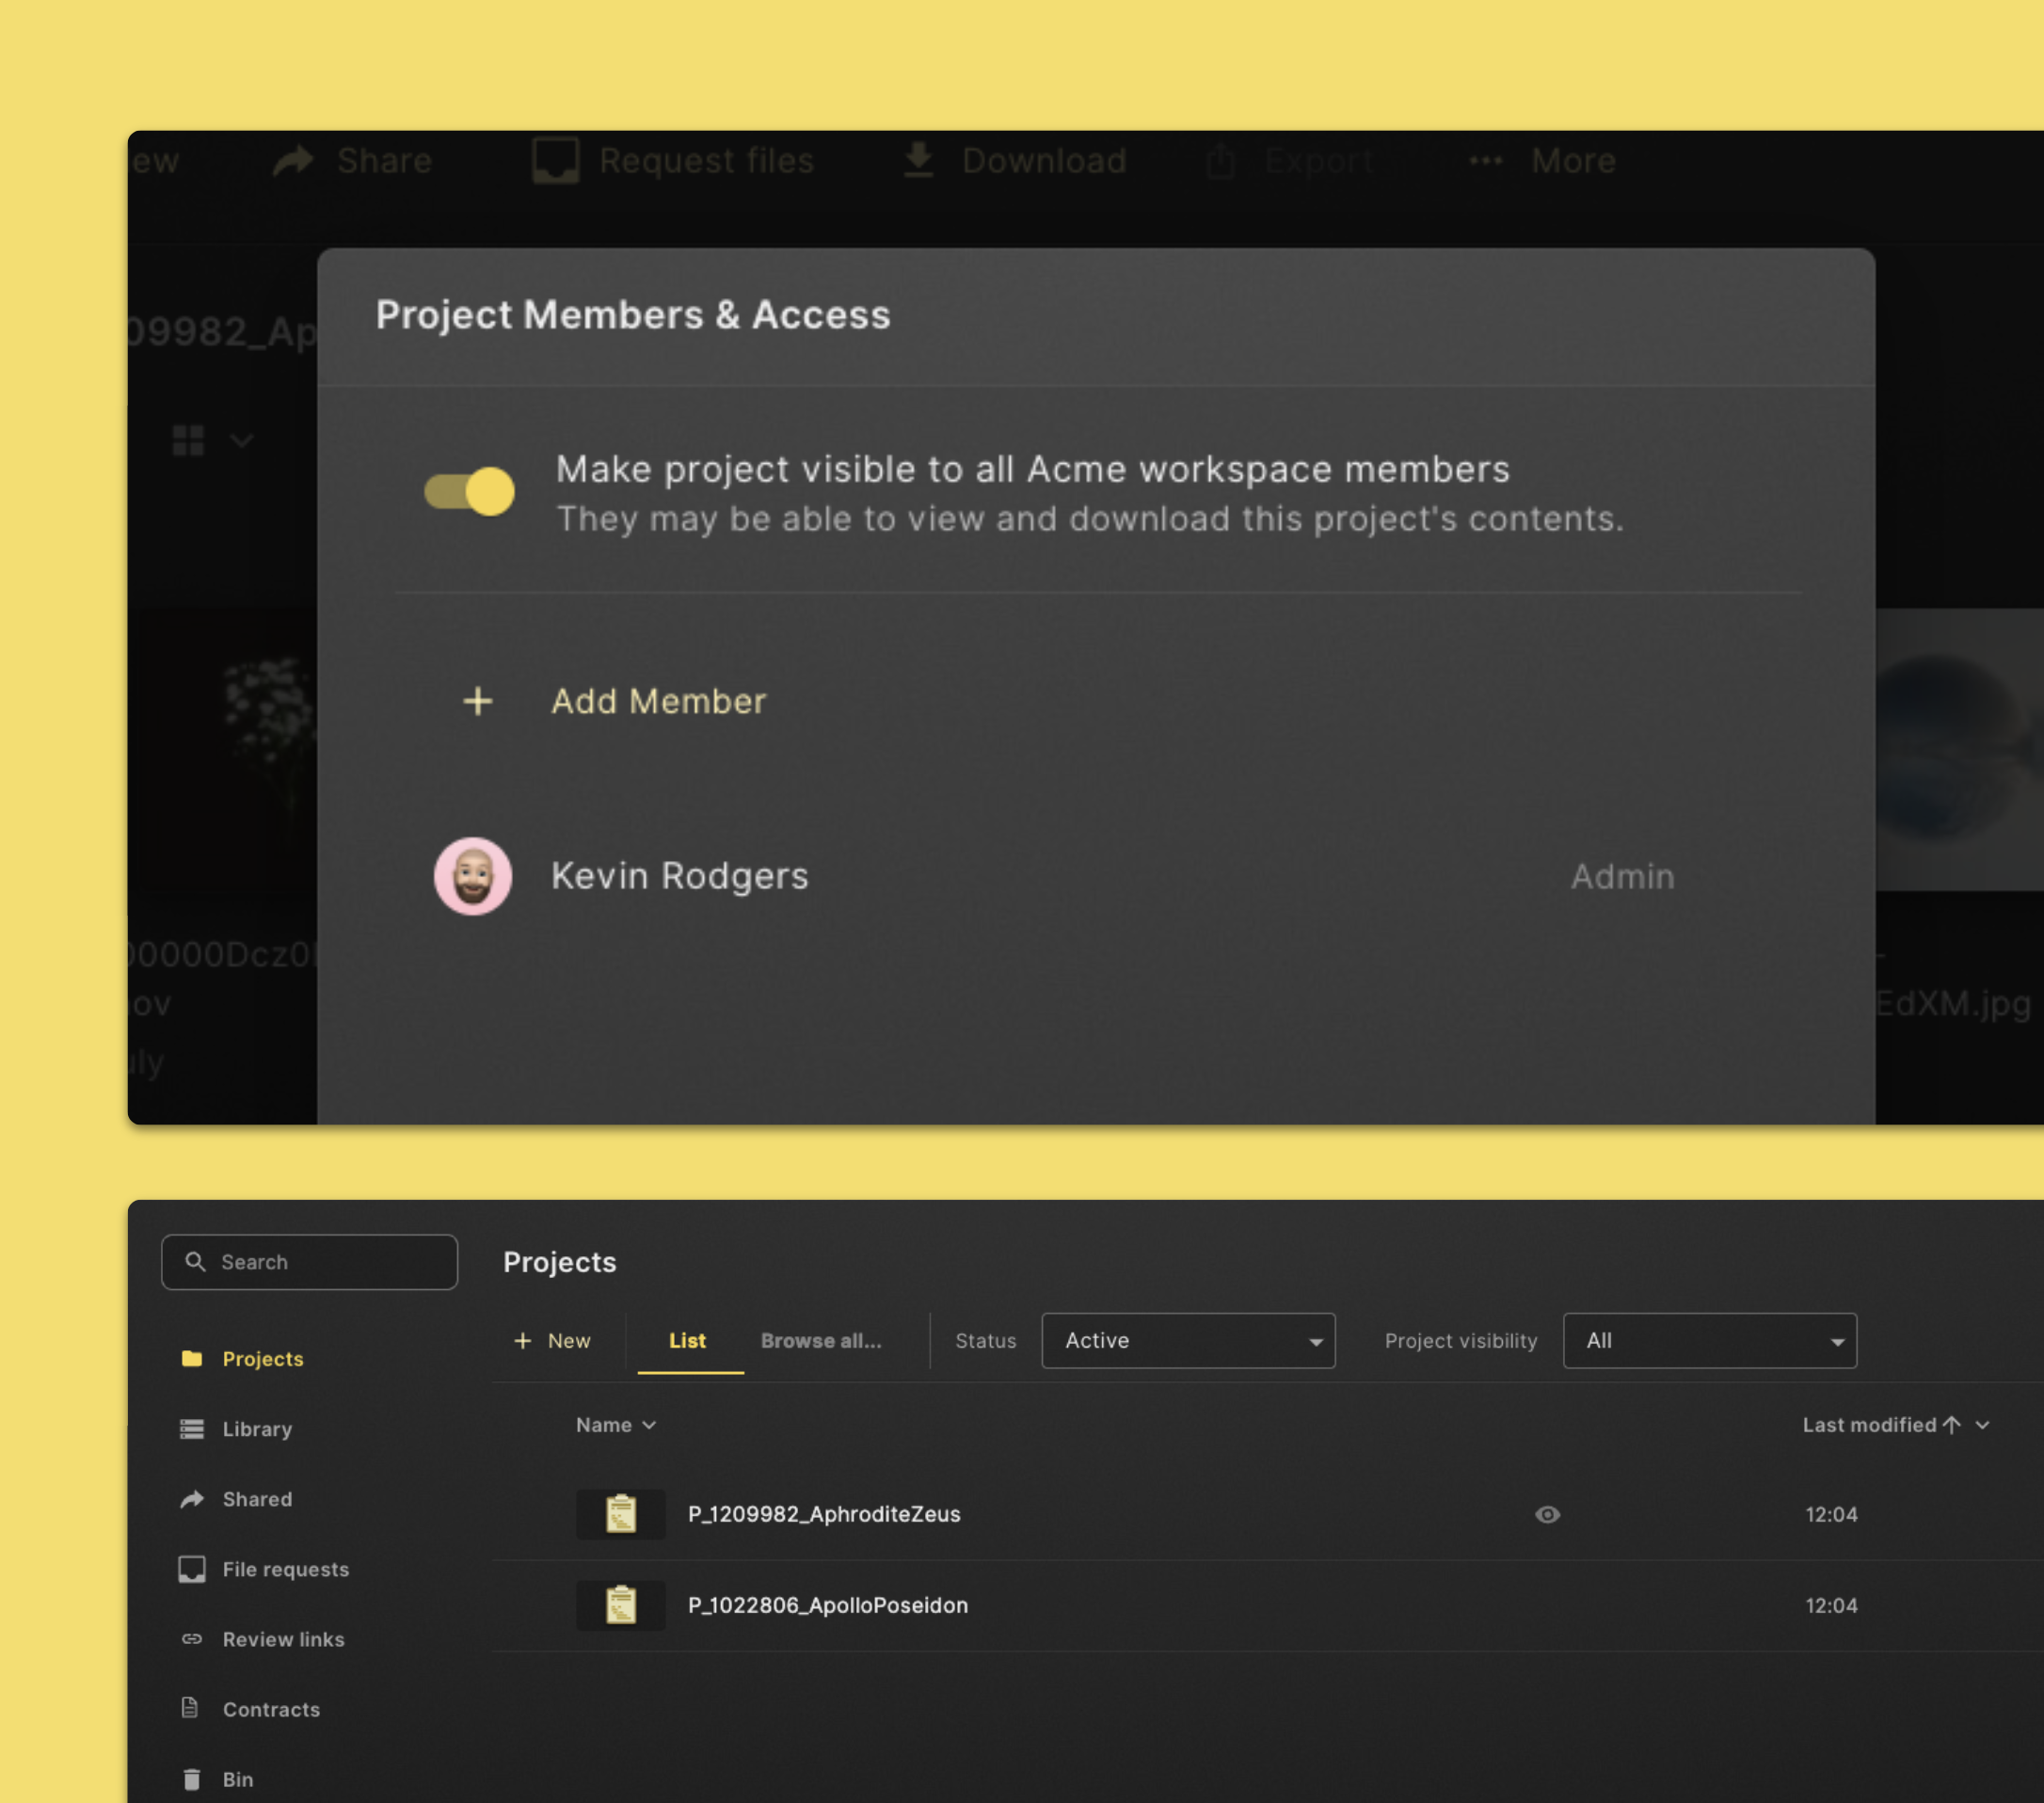
Visible projects will make workspace members able to view and download this project’s contents.
- Open the project you'd like to change visibility.
- Click Members & Access in the top section of the page.
- Click on the toggle on top to change the visibility setting.
- When you're done, click Save changes.
Visible projects will have an eye icon in the projects view.
Add or change project metadata
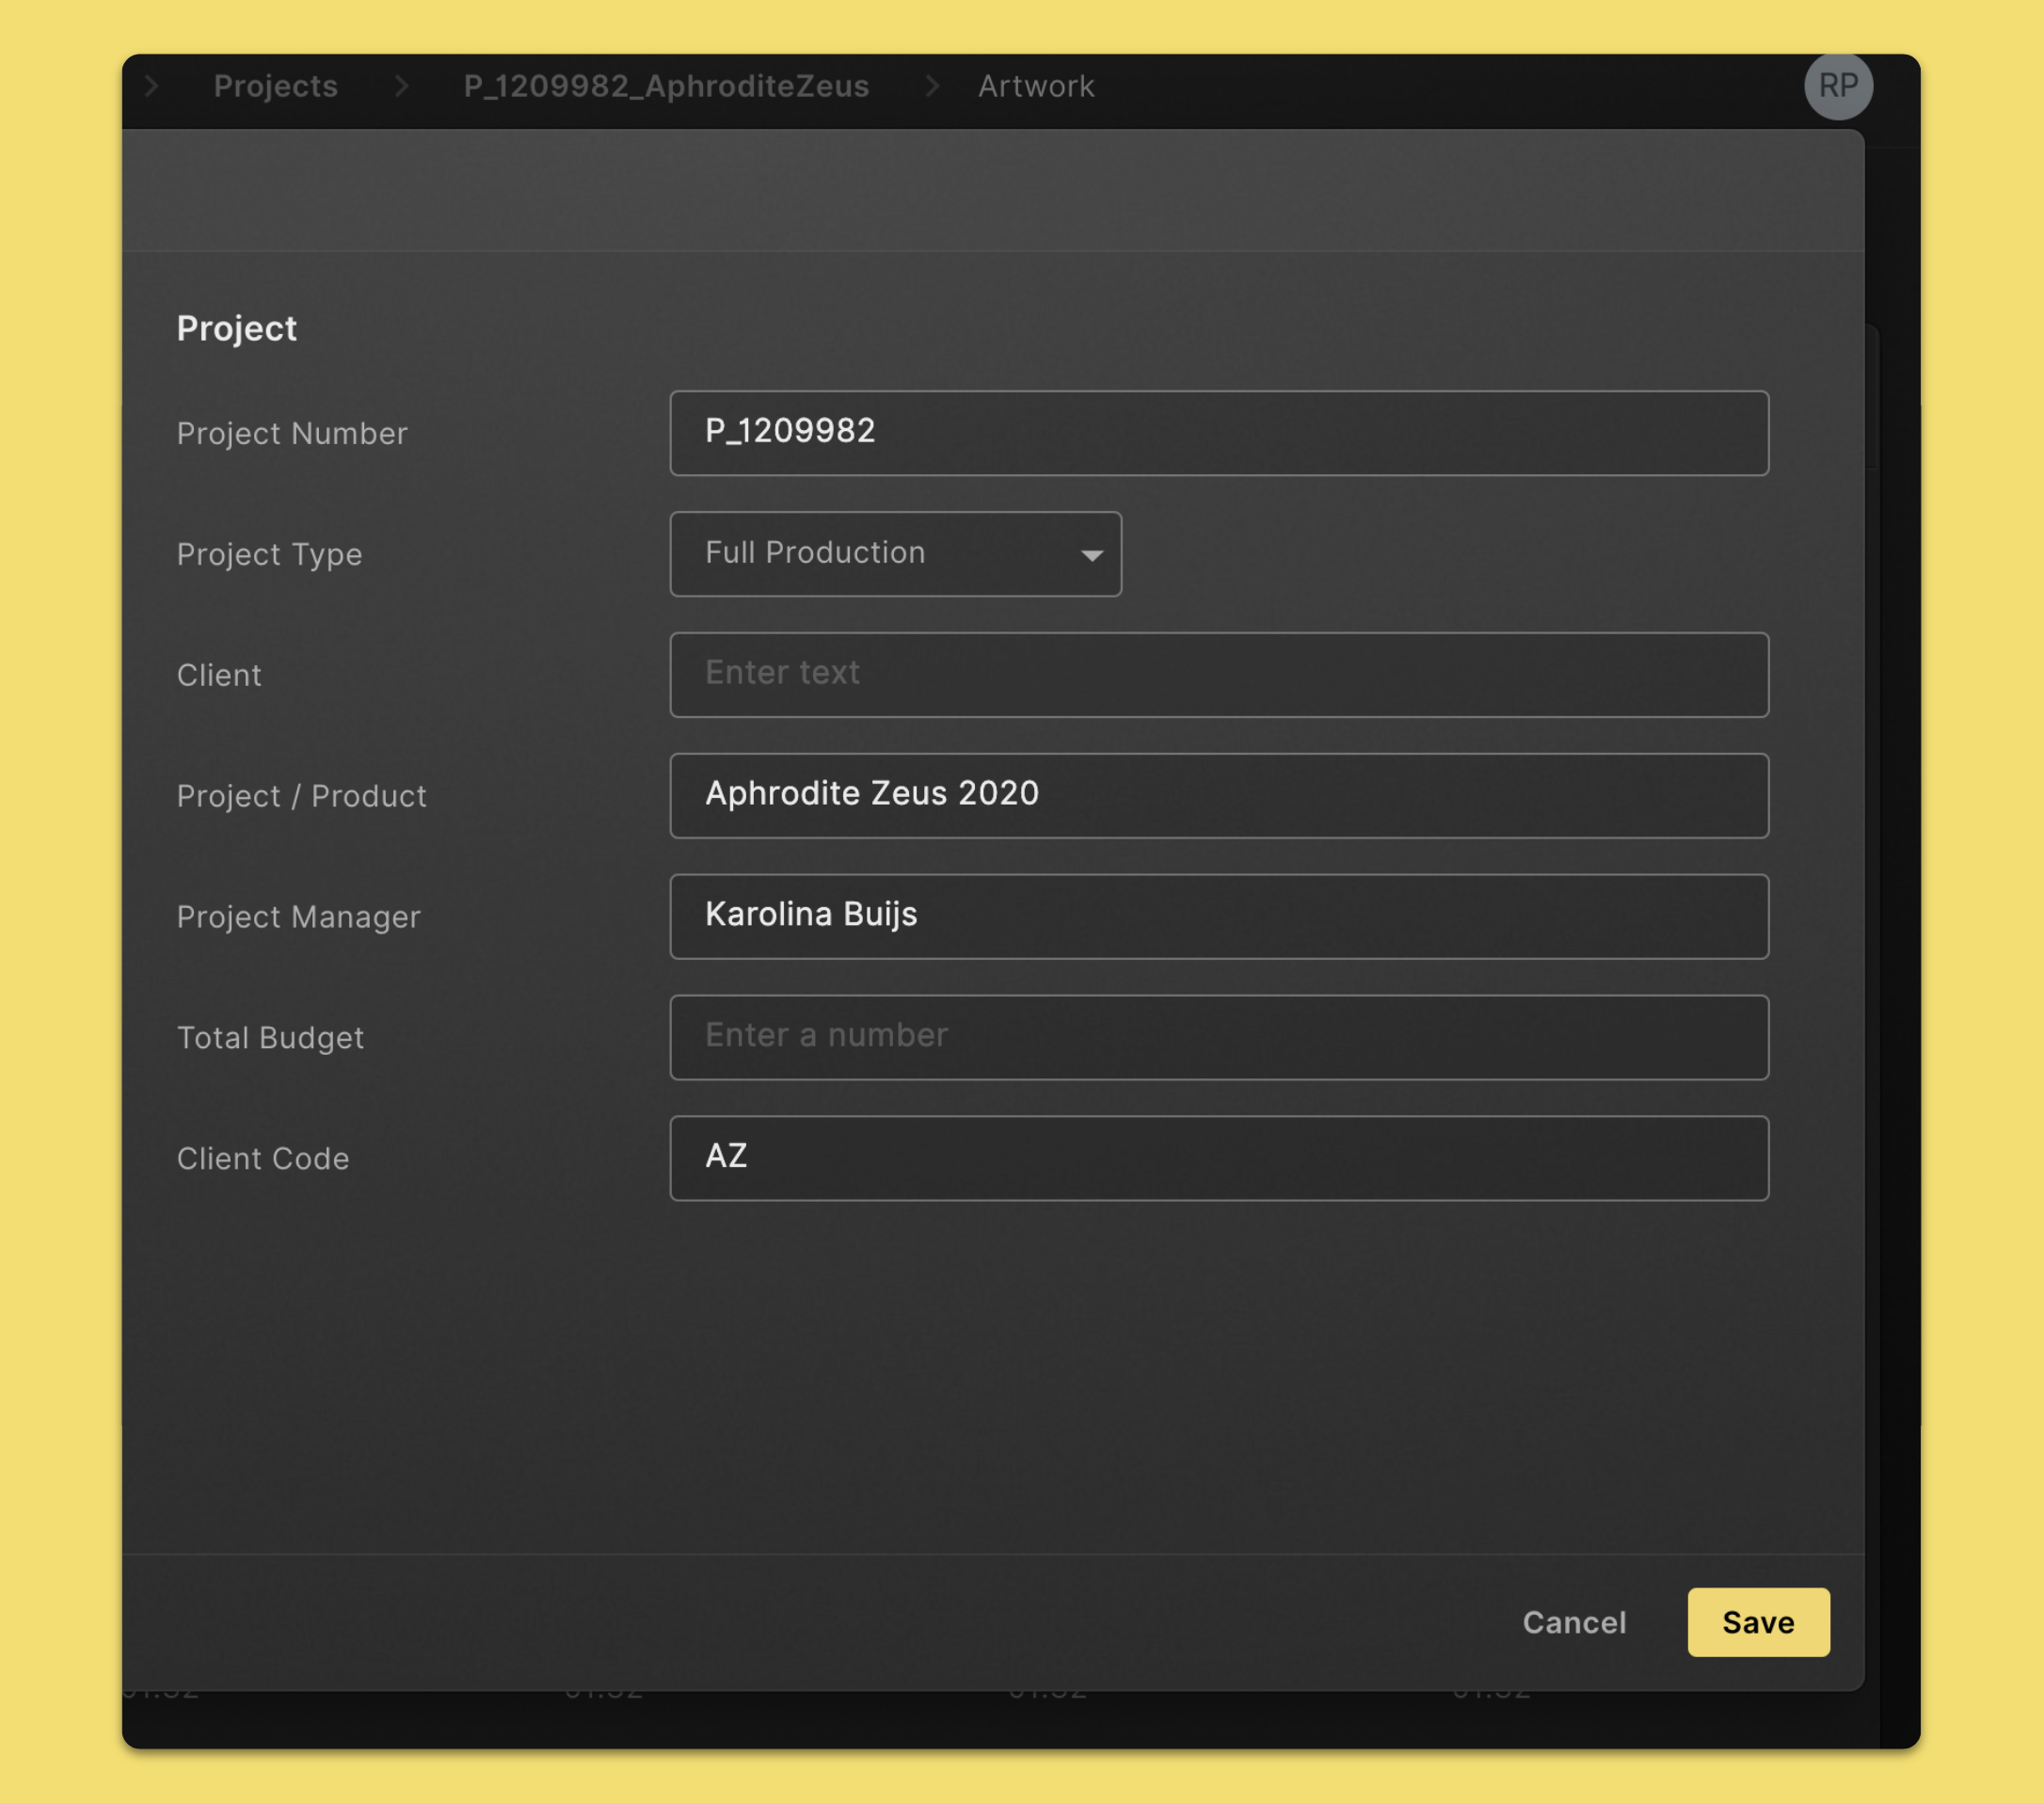
- Open the project you'd like to set metadata for.
- Click Metadata in the top section of the page.
- Click Edit.
- Fill in or change the fields you need.
- When you're finished, click Save.
Editing metadata of a project will affect the project navigator view.
Search for projects with Browse all
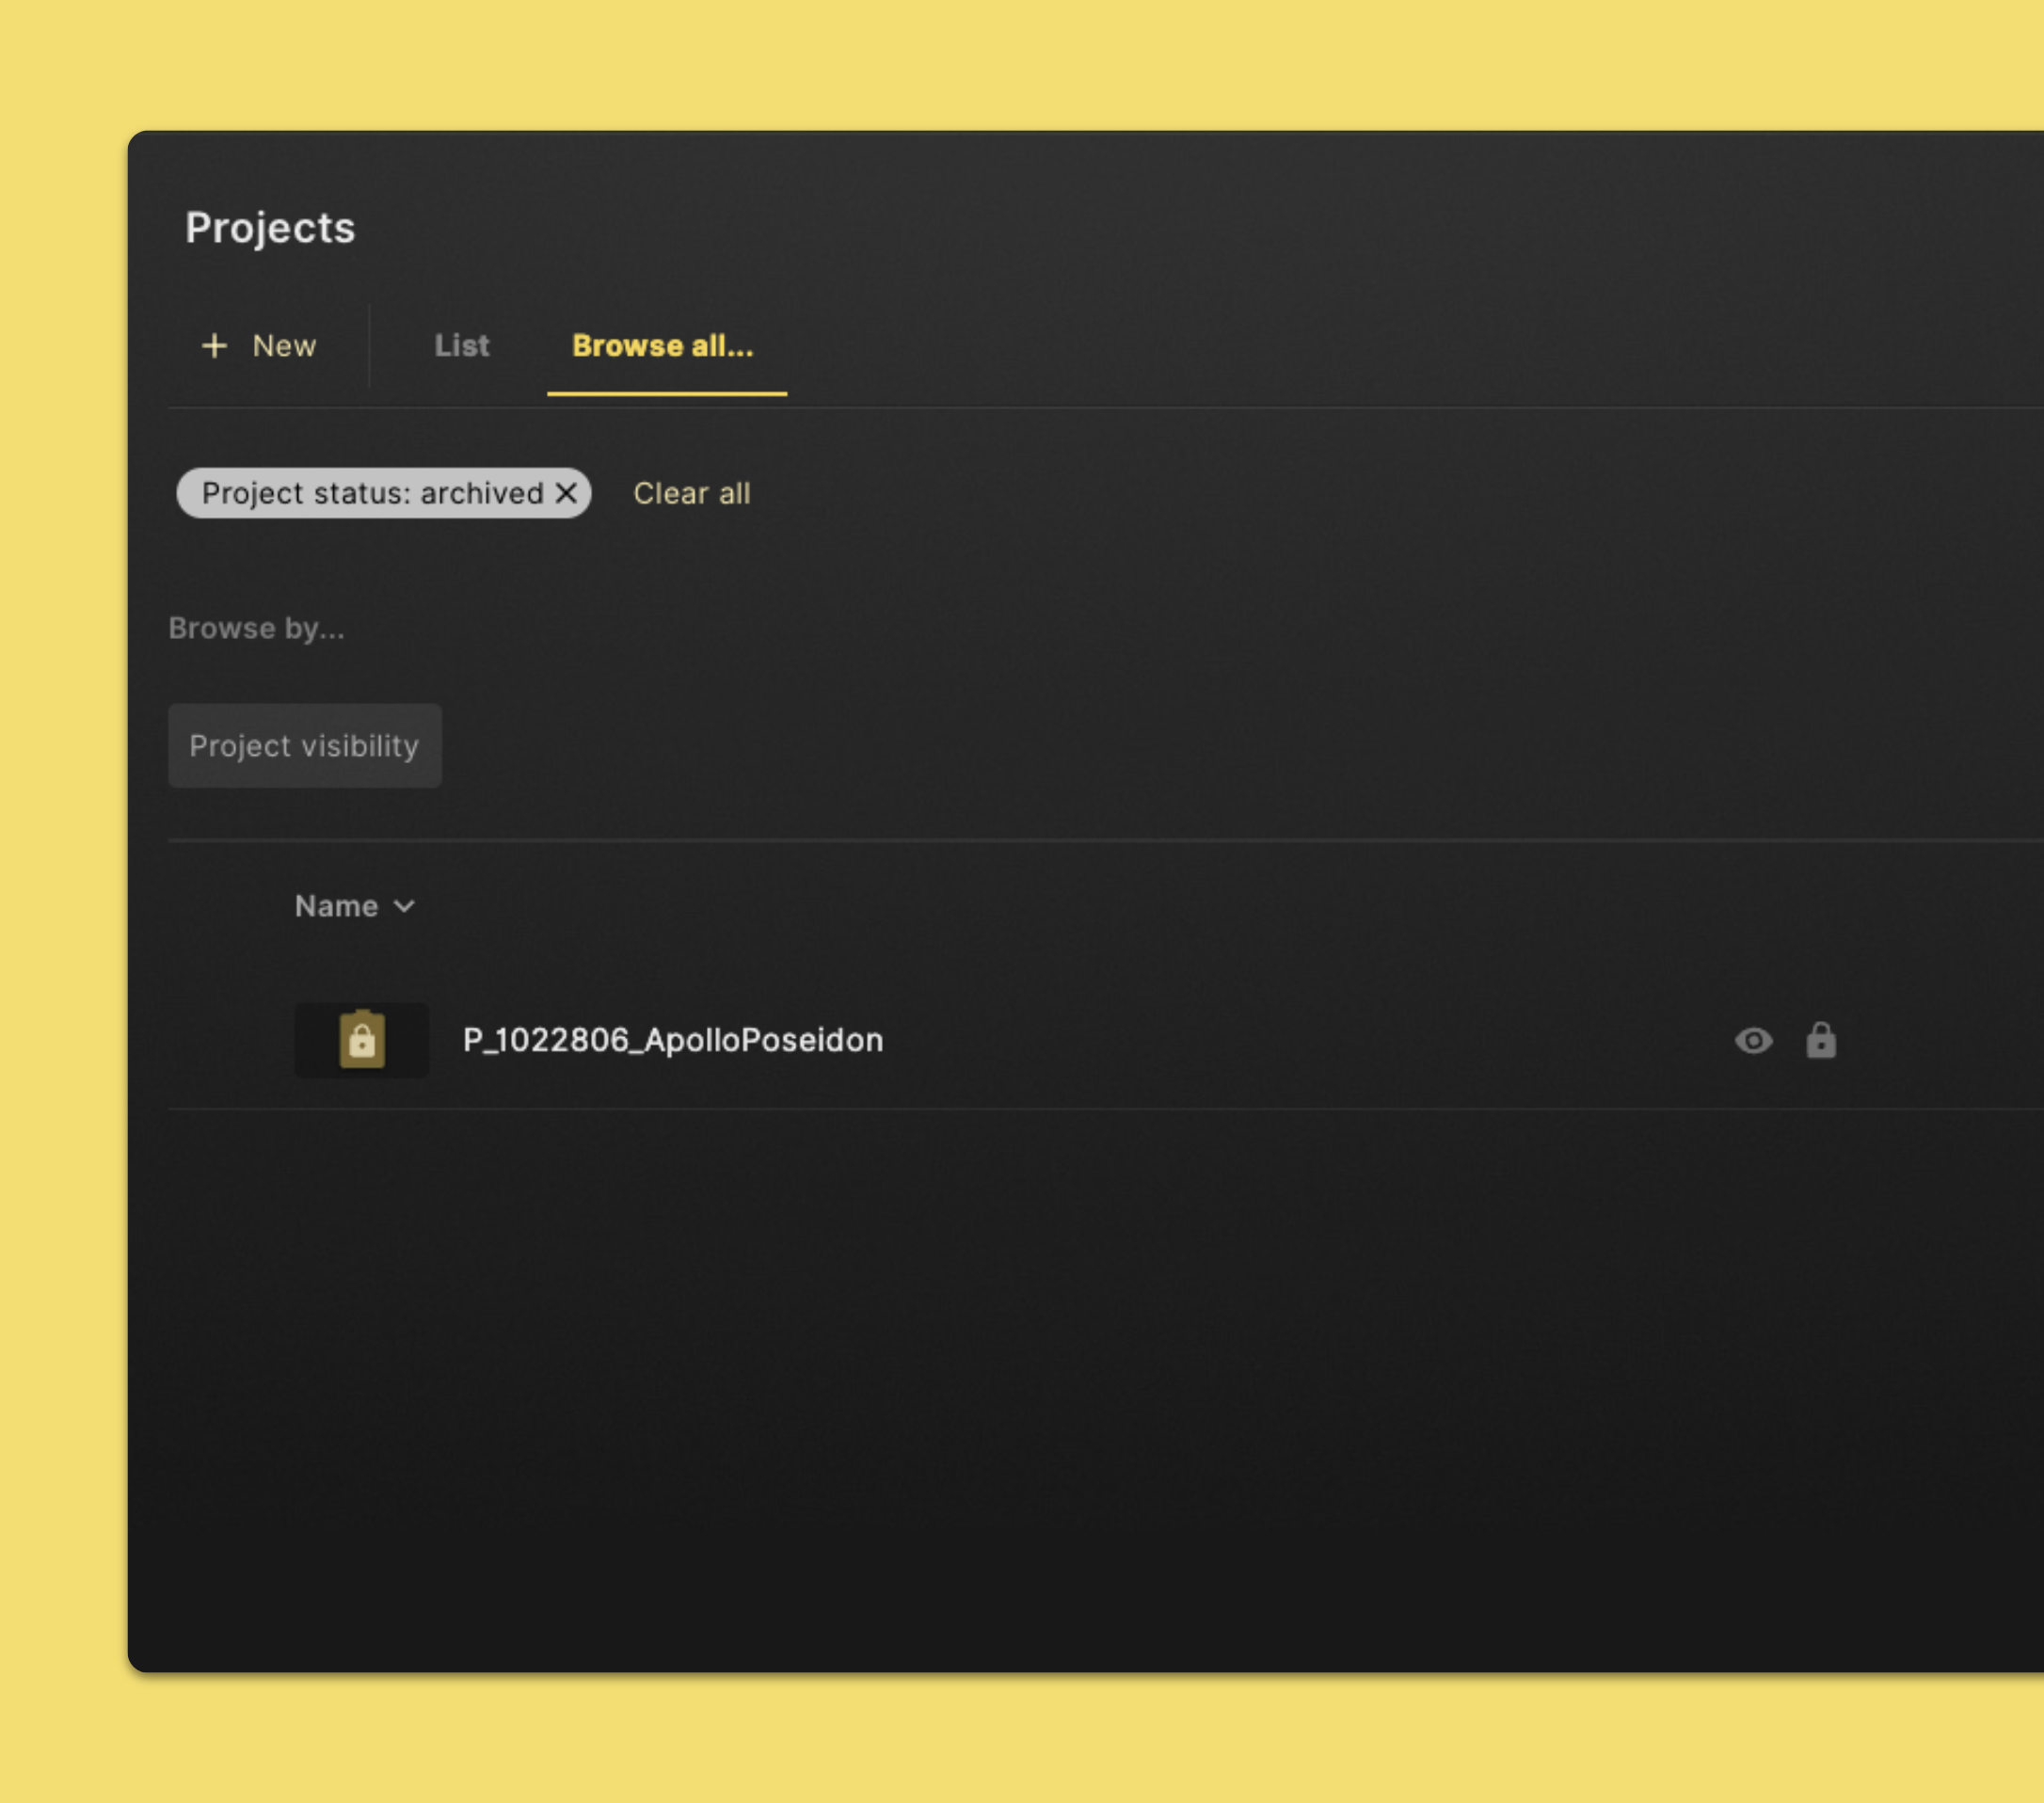
- Click Projects in the left navigation sidebar.
- Click Browse all… in the command menu in the top section of the page. This will open up options to filter projects.
- Here you’re able to select filters like: Status, Visibility, Client, Product or Year. These filters are custom for your workspace. Contact support to change your setup.
Rename a project
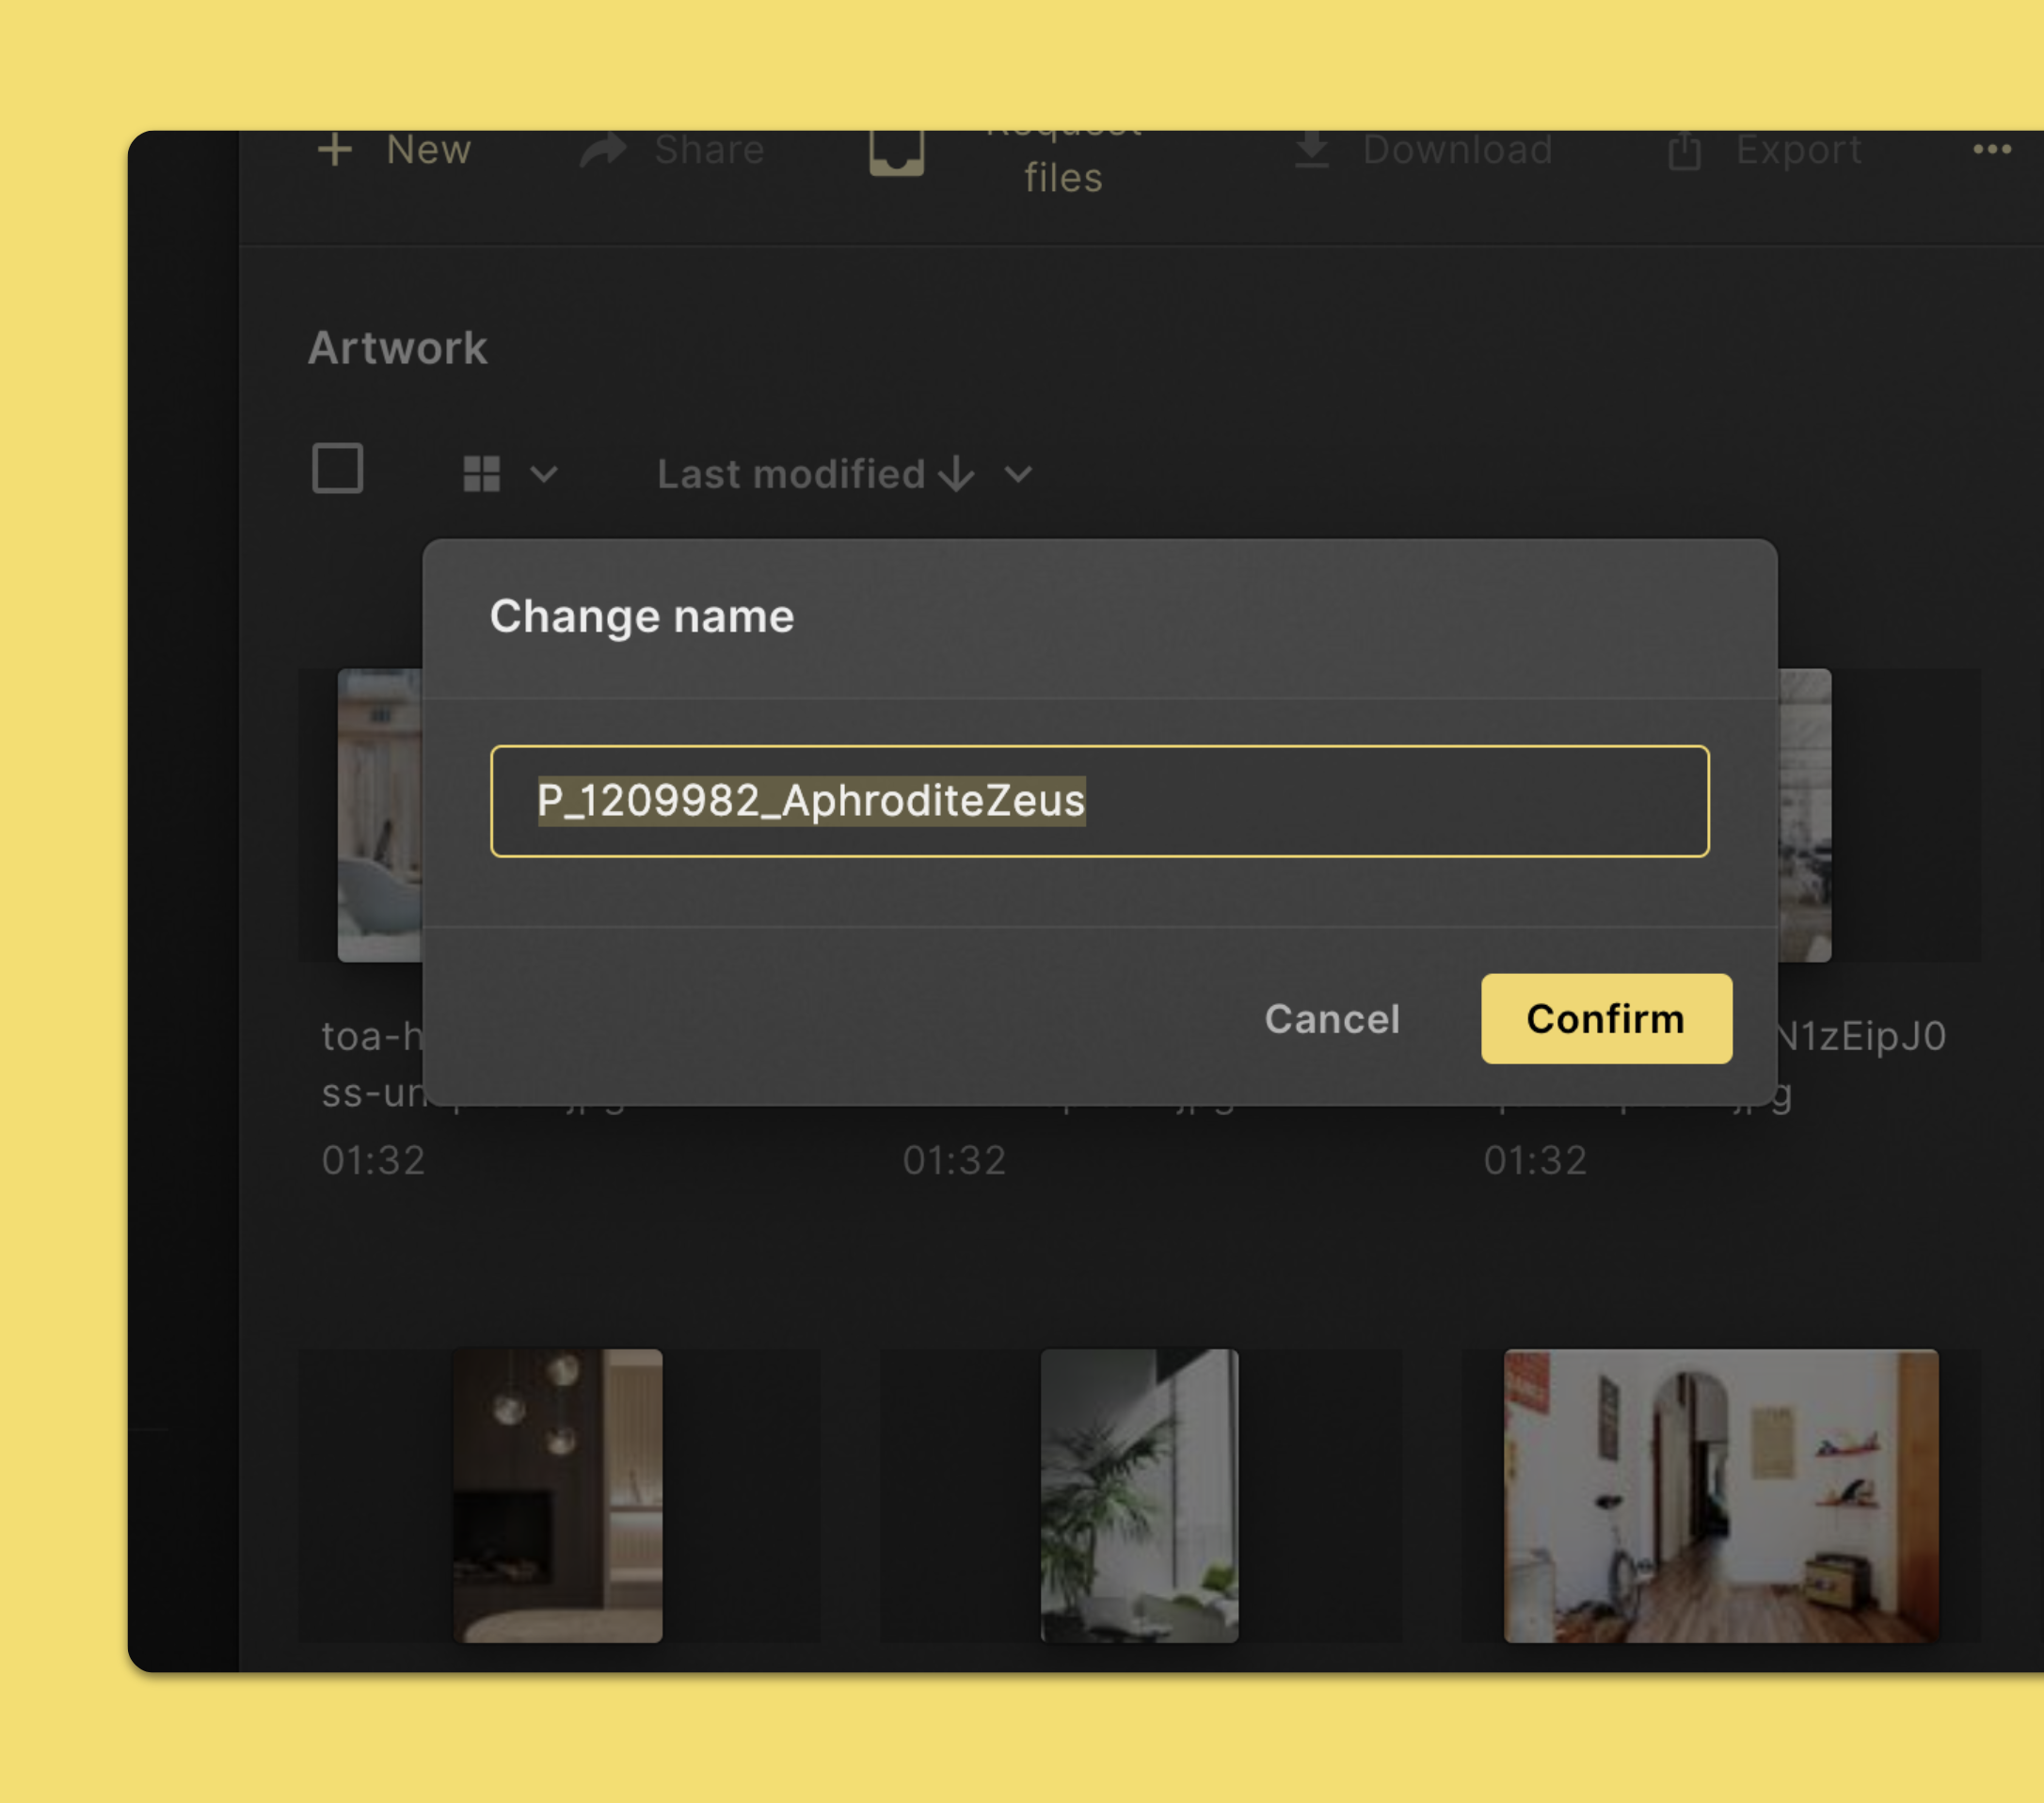
- Open the project you'd like to rename.
- Click Settings in the top section of the page.
- Click Edit next to the project name.
- Change the project name.
- When you're done, click Confirm.
Archive a project
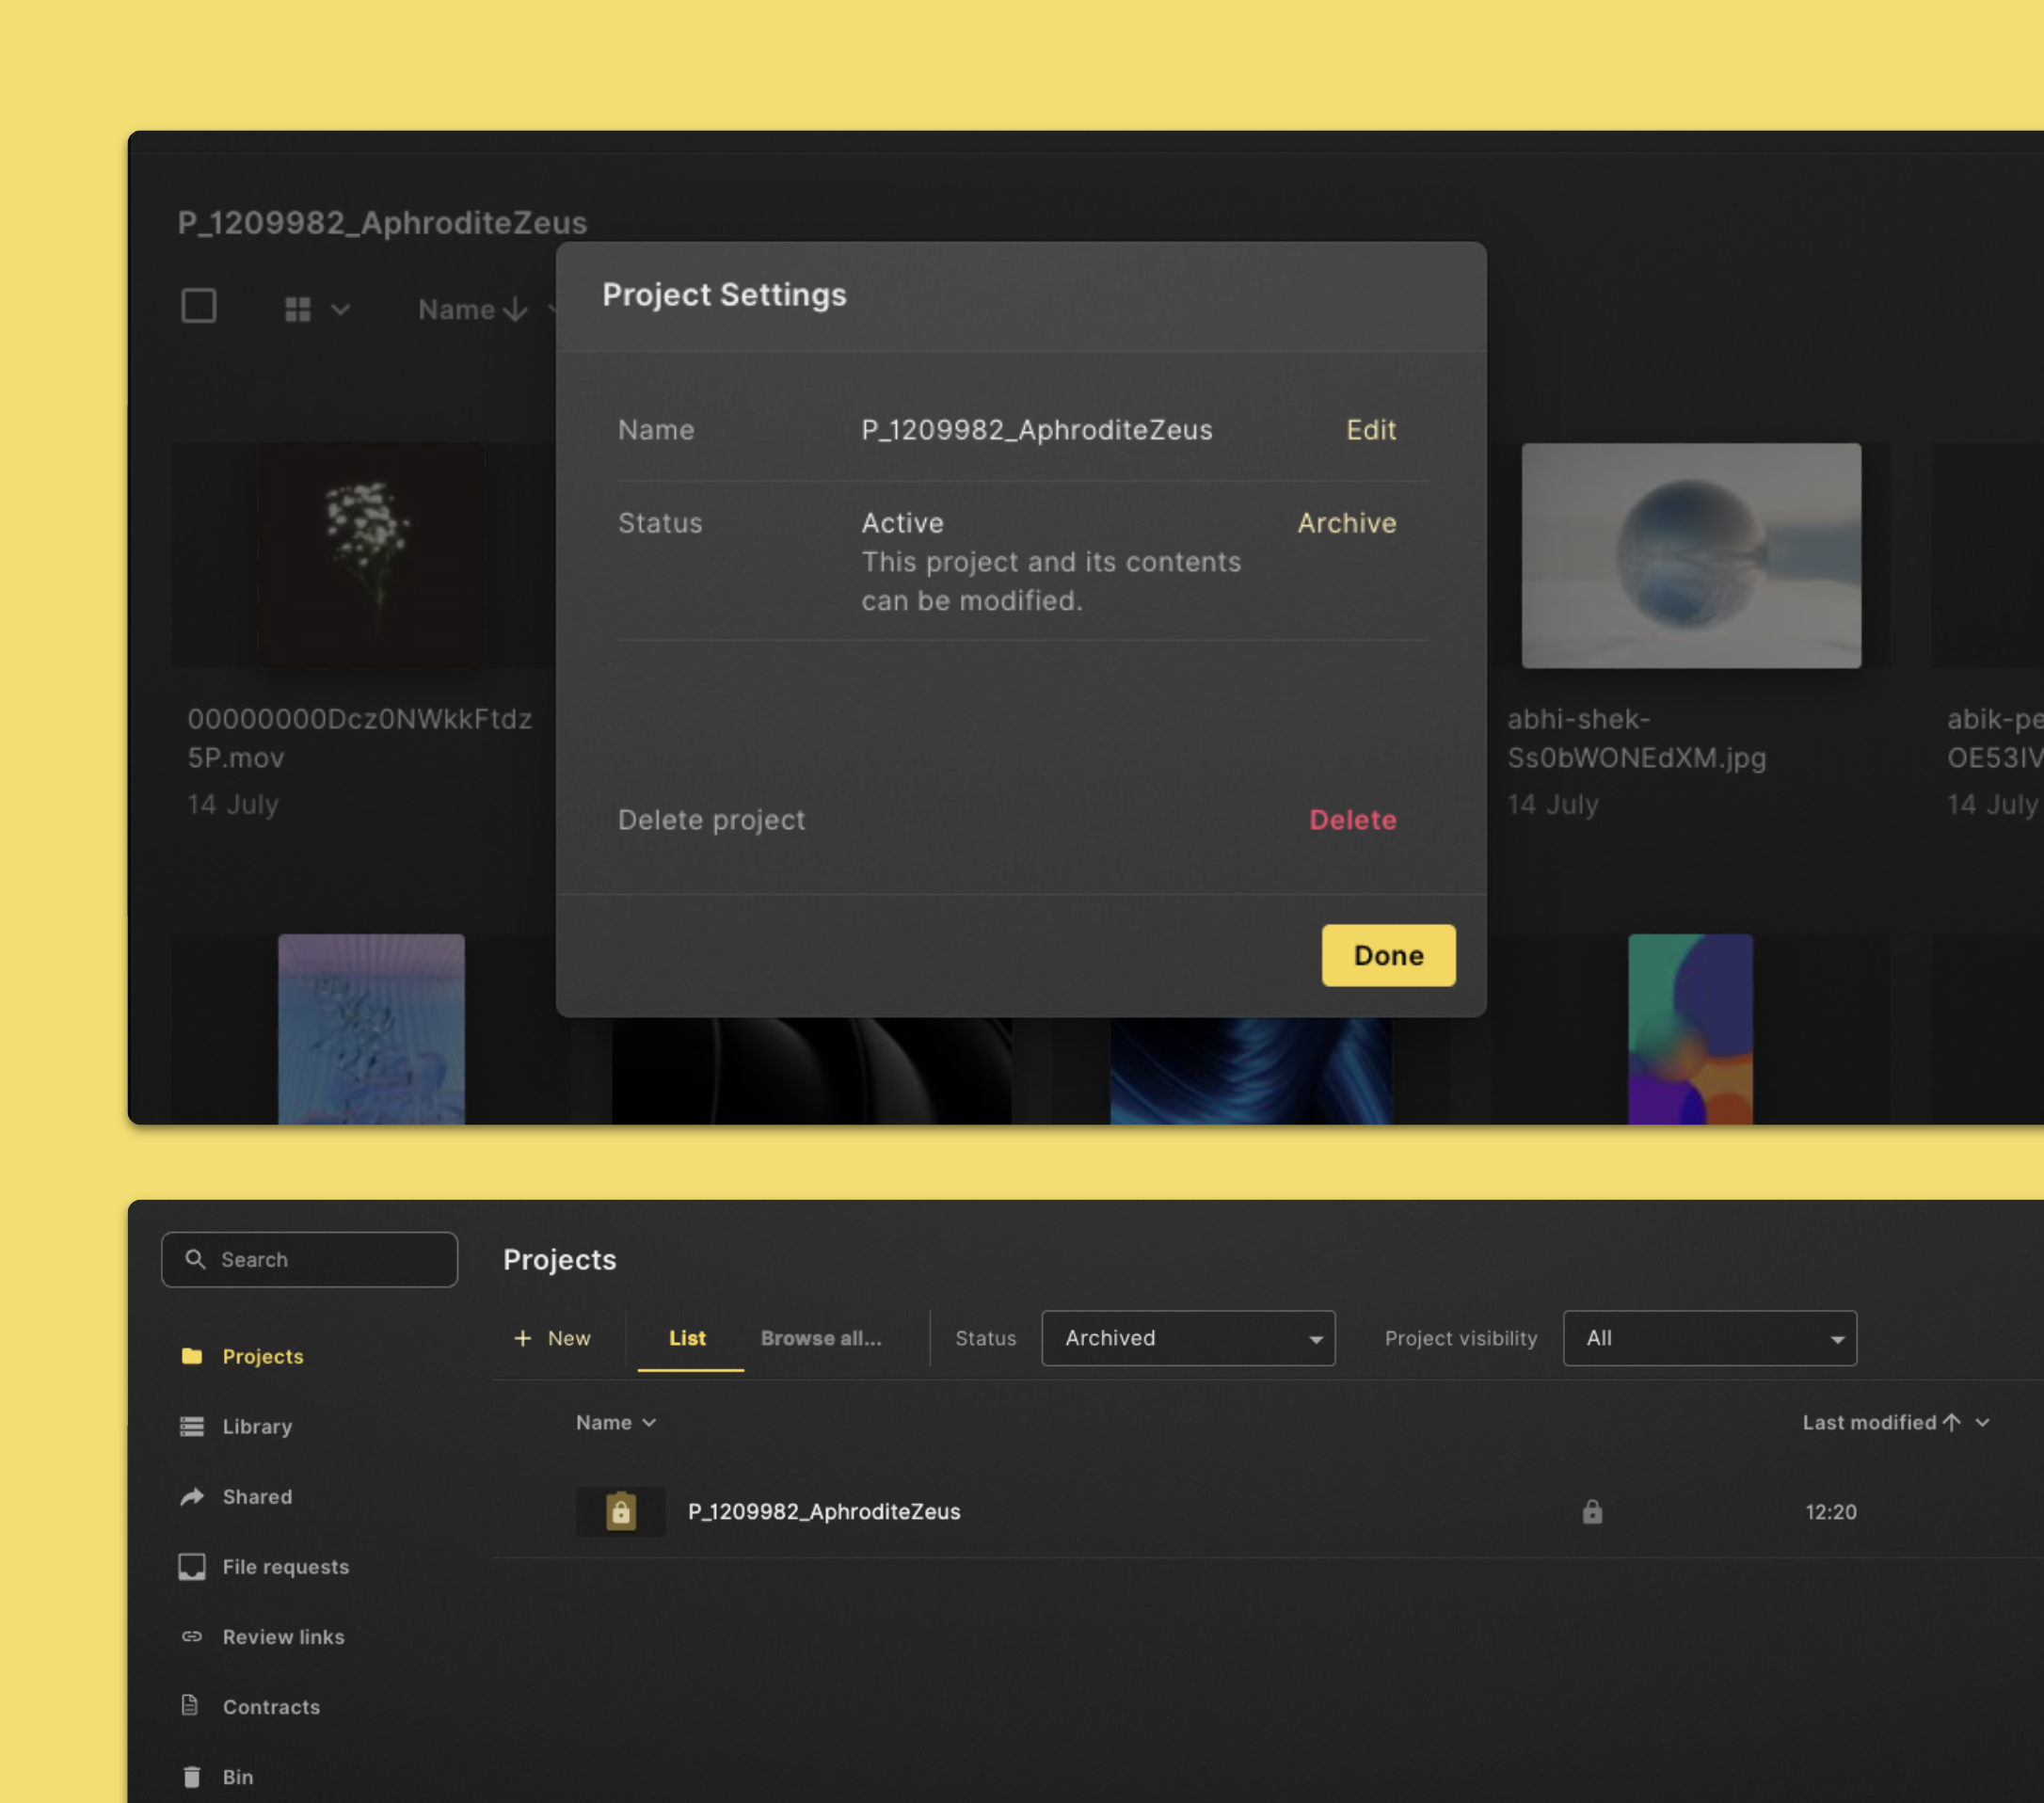
- Open the project you'd like to archive.
- Click Settings in the top section of the page.
- Click Archive next to the status.
- After that you can change visibility of this archived project. Click Change to make this project visible to all workspace members. Click Do not change to keep the current visibility setting.
- When you're done, click Done.
You will be able to view archived projects by changing the Status in the top from Active to Archived or All. Archived projects will have a lock icon in the projects view.
Delete a project
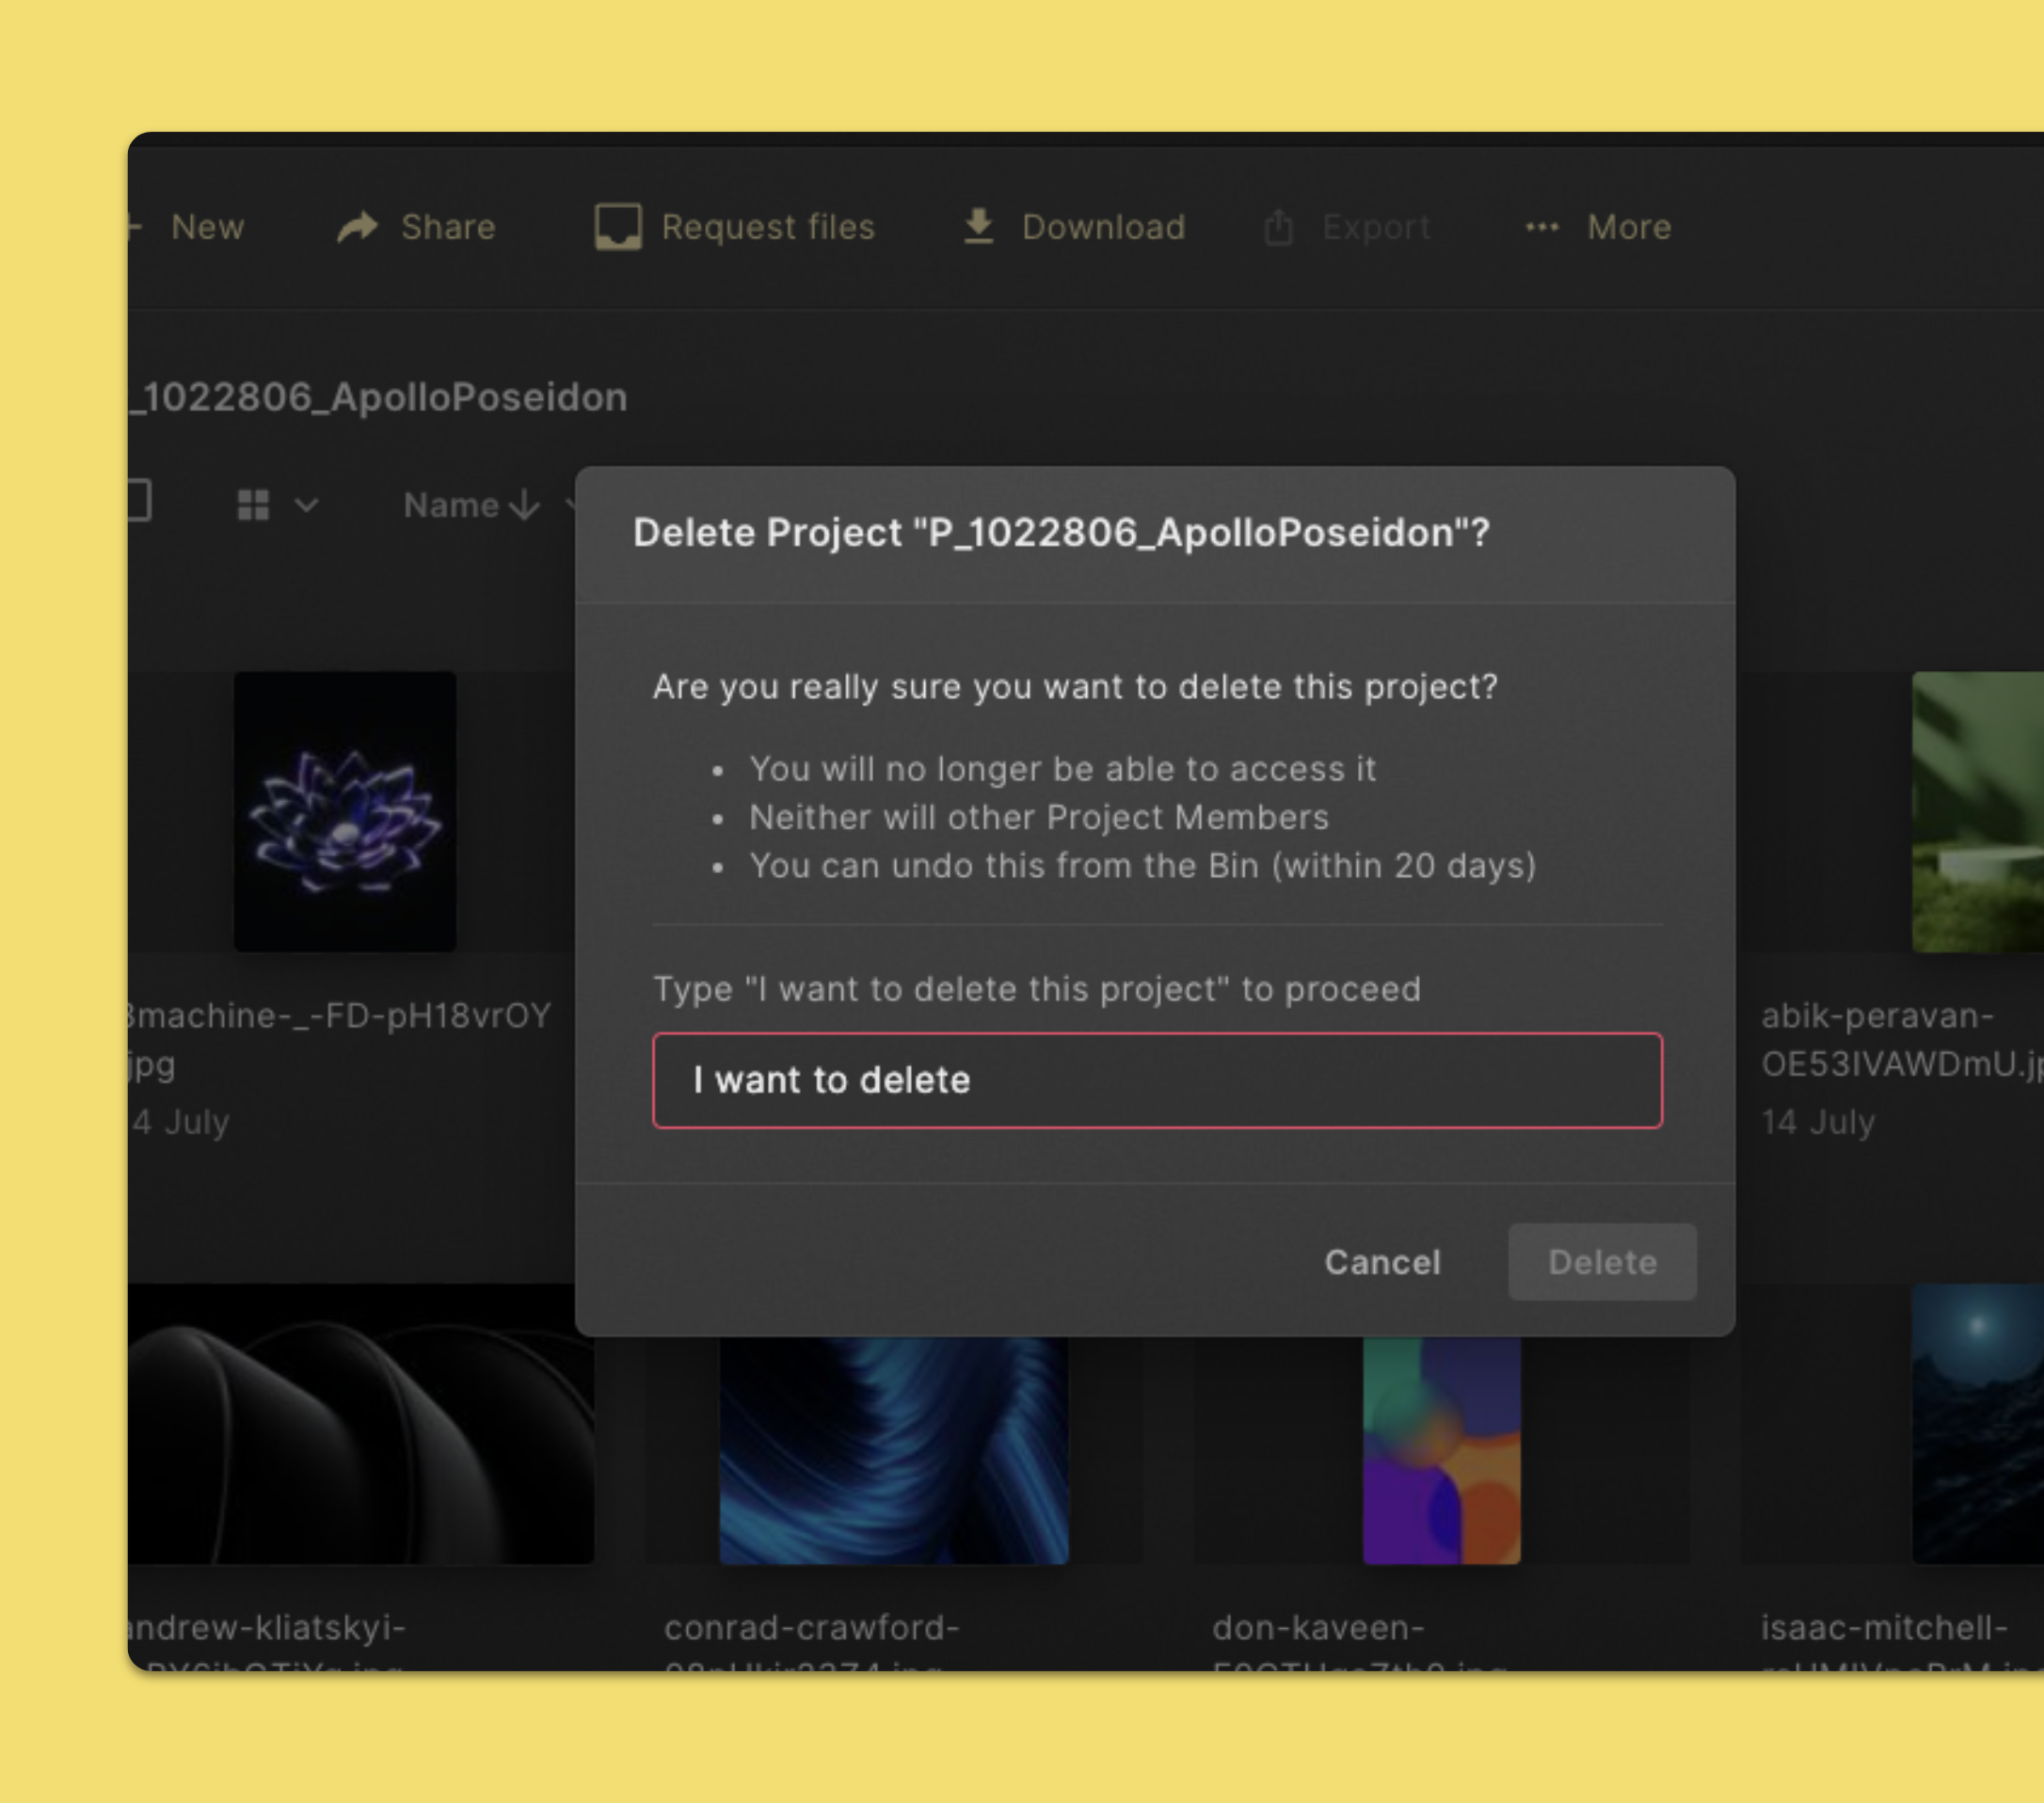
- Open the project you'd like to delete.
- Click Settings in the top section of the page.
- Click Delete.
- Type “I want to delete this project” in the input field.
- Click Delete again to confirm.